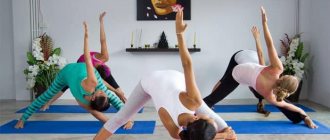
Have you ever tried doing yoga using an app? Usually there is a set of asanas with descriptions and photographs. You learn the Indian name of the asana and its translation, and receive an explanation of how to perform it in simplified and complicated versions.
I started training using this application, did it regularly and for quite a long time. As a result, stretching improved and self-discipline improved. If this is your goal, I recommend trying classes with the app. But the positive health effects will be minimal.
And not because you are bad at repeating poses. Maybe you have excellent stretching and the asanas look exactly like in the picture. At least that's what you think. The fact is that without a teacher it is quite difficult to understand how the asana is performed: in which muscles you should feel tension, which ones should be relaxed, how you should breathe during exercises.
In addition, during independent exercise (especially if you are used to playing sports), the very concept of correct movement is misunderstood.
Simple standing asanas
Tadasana
Tadasana is one of the easiest and most basic poses in hatha yoga . It is performed as simply as possible: legs are close, the weight of the body falls on the middle of the feet. It is necessary to tighten your stomach, tighten your buttocks and straighten your chest. It is important not to strain your neck or raise your shoulders. The gaze is straight, hands down, fingers together. You should breathe calmly throughout the entire asana - 30 seconds. This pose improves posture and relieves fatigue from the nervous system.
Padangustasana
Padangustasana (forward bend), exit from Tadasana. As you exhale, you need to gradually lower your straight spine forward until it is parallel to the floor. Hold for a couple of seconds, then lower even lower, reaching your toes. If stretching at this stage does not allow you to perform Padungastasana in full amplitude, then you need to linger for 15-20 seconds in the position that is now permissible.
The meaning of yoga and features of classes
Yoga is an ancient system that helps to simultaneously improve consciousness, body, spirit and achieve harmony.
Benefits of yoga:
- Increases flexibility and reduces stress.
- Strengthens the immune system. Research by Norwegian scientists https://www.ncbi.nlm.nih.gov/pubmed/23613970 has shown that yoga practice has a positive effect on genetic predisposition to various diseases, increasing immunity at the cellular level.
- Headaches are reduced. After just three months of practice, painful migraine attacks become less frequent and easier to bear.
- Sexual functions improve.
- Improves sleep quality in people suffering from insomnia.
- Regular yoga practice develops a conscious attitude towards food.
The peculiarity of yoga classes is that you can do them independently or with an instructor. But you need to exercise only when you want to, in order to enjoy the activity.
Indications for classes
Since ancient times, yoga has been used for more than just staying fit. Today, basic asanas are used to improve health, eliminate disturbances in the functioning of the body, and in the treatment of all kinds of pathologies.
The practice requires regular practice and does not eliminate pathologies quickly, as is the case in traditional medicine. But it is yoga that will help you get rid of diseases, maintain health and save money that is required for conventional therapy.
Alternative medicine recommends the use of yoga poses in the treatment and prevention of the following pathologies:
- diseases of the spine (scoliosis, kyphosis, hernia);
- arthrosis, arthritis of the joints;
- disturbances in the functioning of the gastrointestinal tract;
- vegetative-vascular pathologies;
- diseases of the genitourinary system, infertility;
- chronic fatigue, physical weakness;
- obesity;
- insomnia;
- consequences of stress.
What benefits does yoga provide?
The life of a modern person is associated with constant stress, which leads to disturbances in the functioning of the body and various diseases appear. Experts who regularly use the technique note a number of useful properties that even basic poses (asanas) provide:
- general condition noticeably improves;
- the nervous system calms down and becomes balanced;
- weight is normalized;
- positive energy appears;
- emotional irritability disappears, scandals in the family disappear;
- health improves;
- the condition of the skin and hair improves.
A person begins to perceive difficult life situations differently and not react to stress. It is a negative emotional state that causes most diseases. Sometimes doing your favorite yoga pose is enough to calm your nerves.
Limitations for yoga
Regular classes put stress on the body, so there are restrictions for practicing yoga. They are divided into permanent and temporary.
- Permanent contraindications.
Hatha yoga asanas should not be used by people with the following diseases:
- mental;
- cardiovascular (chronic and congenital forms);
- traumatic brain injuries;
- blood diseases;
- congenital pathologies of the spine;
- varicose veins;
- oncology.
- Temporary restrictions:
- period of taking medications;
- postoperative periods;
- hypothermia/overheating;
- pregnancy after 3 months and 3 months after childbirth;
- prescribed massage course;
- high or low body temperature;
- a full stomach or temporary problems with the digestive system;
- upcoming visit to the sauna or after a visit to the bathhouse;
- after physical activity.
Important! Only a doctor can tell you when you can do yoga.
Age criteria
Some people who practice yoga claim that it is never too late to practice. The same words belong to the founder of Iyengar yoga, who spent his entire life practicing himself and teaching it to others. This teacher was only 2 years short of his centenary, but his teachings are used by many practitioners. However, there are some restrictions for older people.
Poses in hatha yoga are prohibited for the following pathologies:
- hypertensive diseases;
- inoperable intervertebral hernia;
- injuries and damage to joints;
- thrombosis, varicose veins;
- mental disorders;
- suffered a stroke, heart attack.
But some diseases from this list are not prohibited if they are included in the rehabilitation program by the attending physician. Sometimes it is enough not to perform asanas while standing. After all, most poses are performed in a sitting position.
Advanced standing poses
Utthita Trikonasana
Utthita Trikonasana is performed in triangle pose . While in Tadasana, you need to use a jump to change your position so that your legs are wider than your shoulders and your arms are directed to the sides. Gradually, you should turn your feet to the right side and lean to the right so that your left hand is on the outside of the foot. The gaze should be directed to the thumb of the right hand. It is important that a straight line should run from the left hand to the right. Be sure to repeat the asana on the left side.
Utthita Trikonasana II
Utthita Trikonasana II is performed from the same starting position - legs apart, arms to the sides .
But you should lean straight forward. After reaching parallel with the floor, you need to point your right hand down and rest on your palm. Then raise your left hand up, directing your gaze after it. It is important to maintain a straight line with your arms and not round your back.
Warrior Poses: Maximum Difficulty
Virabhadrasana I
Virabhadrasana I in hatha yoga is also performed from Tadasana . You need to raise your arms up, and then clasp your palms above your head. The legs diverge by 120-130 cm, which from the outside resembles a classic lunge. The angle between the knee should be straight, and the right thigh should be parallel to the floor. The left foot can be slightly turned to the right. The face, chest and knee should be turned in the direction of the right foot. The head is thrown back and the gaze is directed upward.
Virabhadrasana I
Virabhadrasana II is very similar to variation I, but the arms are not raised upward, but are directed to the sides . From Tadasana you need to stand in a stance with your feet wider than your shoulders. Then turn your feet to the left and lower your left knee until your thigh is parallel to the floor. The body remains straight, but the gaze is directed behind the left hand - to the left. Palms face down. It is important to maintain a straight back, keep your stomach and buttocks toned.
Virabhadrasana III
Yoga also includes Virabhadrasana III, which is achieved from Virabhadrasana I. To perform the exercise, you need to lower your chest onto the thigh of your front leg so that your arms are parallel to the floor. Then gradually lift your left leg off the floor, transferring the weight to your right. The knee of the supporting leg must be slowly extended until the leg becomes straight. It is enough to hold the pose for 30 seconds. When performing warrior pose, you need to repeat the exercise on both sides.
Subtleties of Virabhadrasana
It is easier to maintain balance in the warrior pose if the weight is evenly distributed on the feet. Taking the third position, you can imagine how something stretches the body by the arms and leg, which is suspended. If lower back pain prevents you from performing the asana, then you need to practice the exercise in a lighter version, resting your hands on your knee or floor.
The warrior pose in any variation strengthens the muscles of the abdominal cavity and hips, helps to establish balance and make the lower back more resistant to stress. Joint mobility also develops, which is useful for those who are interested in different types of physical activity. Virabhadrasana strengthens the hamstring muscles and allows for faster recovery from joint injuries.
Contraindications to yoga
Avoid practicing yoga, especially at home, if:
- elevated body temperature (above 37 degrees);
- ARVI, acute respiratory infections, as well as general poor health;
- exacerbation of chronic diseases;
- disorders of the cardiovascular system.
You should also not start yoga after active physical activity, after a bath or after drinking alcoholic beverages (at least a day must pass), after suffering severe stress and irritation, as well as in the first 2 days of menstruation.
Balances
Asana “Chair” - Utkatasana
One of the simplest balances in yoga is chair pose . While in Tadasana, you need to raise your arms above your head and then slowly lower your pelvis back, bending your knees. With your knees bent at an obtuse angle, your body should be tilted forward, reaching for your arms. This is the final part of the exercise, in which you need to stay for up to 40 seconds.
In general, yoga and balances develop a sense of balance, teach you to concentrate and relax even in poses that are uncomfortable for the body. In addition, performing balances on one leg develops muscles and helps strengthen the muscle corset. It is easiest to balance when your gaze is directed at a stationary point below. The most difficult option is to be in balance with your eyes closed. An intermediate step can be looking straight ahead.
Classic balances on one leg
Vrksasana 1
Vrikshasana, otherwise called tree pose in hatha yoga, has two variations . To perform the first, you need to take Tadasana and pull your leg bent at the knee towards your stomach. The supporting foot should point strictly forward, and the knee should remain straight. Grasping the knee of your working leg, you should maintain the pose for up to 30-40 seconds. Exercise has a beneficial effect on the knee joint, coordination and bowel function.
Vrikshasana 2
A more complex variation of Vrikshasana is performed from the same starting position . But now the working leg should be turned to the side and, lifting it up, pull the foot as close to the perineum as possible. If your leg slips off the inner thigh, you can support it with your hand. Otherwise, straight arms are raised up and palms are closed. The asana is performed on both sides. It is preferable to start with the leg that is worse at maintaining balance.
Complex balances on one leg
Utthita Hasta Padagushthasana 1
Utthita Hasta Padagushthasana begins with Tadasana . The right leg, as in Vrikshasana I, needs to be pulled towards you, clasping the big toe with your hands. As you exhale, you should gradually straighten your knee. The supporting leg should also remain straight. During execution, it is important to keep your abs tight and your back straight. But you should not round your lower back, so as not to harm your back. A detailed description of the pose allows you to perform it as correctly as possible.
Utthita Hasta Padagushthasana 2
Utthita Hasta Padagushthasana II is also performed, but before performing it, the hip joint should be opened . The leg is straightened not in front of you, but as far as possible to the side. If you can't maintain balance, you can straighten your opposite arm. If it is still difficult, then you can rest your foot against the wall, but you should raise your arms above your head. There is another problem in developing a pose - stretching does not allow you to straighten your leg. It is worth using straps, a towel to grab the foot, or hold the foot with both hands, but under the kneecap.
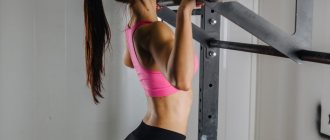
Balances on hands
To increase arm strength, you need to regularly perform push-ups. In hatha yoga, women often practice push-ups on their knees. After the strength of the hands is already sufficiently developed, you can begin asanas.
Bakasana – crane pose
Bakasana is known as crane pose . First you need to squat down and place your palms on the floor in front of you. Gradually shifting the weight of the body onto your arms, you should raise your pelvis, spread your knees to the sides and place your shins behind your shoulders. Then you need to carefully tear off one foot. When this becomes easy, it’s time to transfer the weight completely to your arms and lift both legs off the floor. The middle of the back needs to be pulled up, the pelvis behind the back, and the legs behind the pelvis. You can complicate the task if you try to straighten your arms at the elbows.
Chaturanga Dandasana
Chaturanga Dandasana is another easy arm balance variation that is worth doing to increase strength . The starting position is the well-known plank. Then the arms need to be bent so that the forearms are parallel to the floor and the whole body is a straight line. If it is difficult to maintain this position, the knees drop to the floor.
Let's learn the first asanas
The first yoga position is the basis on which the most difficult exercises will be performed.
- Child position (balasana). The main goal is to relax the muscles between difficult asanas. Can be used as a warm-up.
Starting position: stand straight, feet together. As you exhale, slowly lower your knees and push your pelvis toward your heels. Raise your hands during the inhalation phase and slowly bring them together to touch the floor.
- The mountain position (tadasana) is the basis of all standing positions. Develop coordination and stability.
Stand up straight with your legs tightly closed and your arms at your sides. The back is in a straight position. No emotions.
- Bag stool (utkatasana). Helps develop balance and a sense of concentration. To do this, stand straight and place your hands on your head. Slowly lift, bend your knees and lower your pelvis to the ground. Body forward, forming a clear line with your arms. Stand for 40 seconds. If you encounter difficulties, try completing the task with your eyes closed.
Tree position (vrikshasana). Continue with traditional tadasana. After this, lift one leg, bend your knee and pull it towards your stomach. The front of the supporting leg is forward.
- The most common sitting position is sukhasana. Sit comfortably on a mat with your legs crossed. Raise your hands as if trying to grasp an object. After completing a certain number of breathing cycles, lower your arms. Make a series.
- Equality (savasana). This is for those who are just discovering the world of hatha yoga. Sit on the mat with your back facing down. Arms and legs are relaxed.
Take a deep breath and stretch all muscle groups. Do not relax until you have completed your breathing cycles. Then give your body a rest.
Mountain Pose - Tadasana
This position teaches a person to be stable and stable, like a mountain.
The word "tada" means "mountain", hence the name.
This is the starting position for all other asanas.
- Stand with your heels slightly apart and lower your arms freely to your sides. Feel the weight of your body, feel how the weight of your body is pressing on the floor and the floor is supporting you.
- Turning your head, you reach for the sky. As you exhale, you can relax your shoulders.
Tree Pose - Vrikshasana
This pose provides a grounding feeling, improves balance, and tightens the legs and back.
This position of the body makes you feel the center of gravity.
This in turn, in addition to the health benefits, also develops the nervous system and also changes the psyche by focusing the mind.
The benefits of this position are unlimited.
Downward Facing Dog - Adho Mukha Svanasana
Perhaps the most recognizable yoga position. This asana gives a balance between strength and flexibility. Most yoga exercises involve performing this asana several times.
- Start with four, placing your hands slightly in front of your shoulders. Stand on your tiptoes and raise your legs.
- Press your pelvis with your legs. Push the floor with your hands, lift your tailbone and stretch your spine.
- Relax your neck
- Take 3-4 deep breaths and return to the starting position.
Chair Pose - Utkatasana
Asana to strengthen the muscles of the lower back, abdomen and legs.
- Start in a standing position, feet together, knees tied. Stretch your hands. In this position, bend your knees at the correct angle.
- The tailbone is under itself, without straightening the pelvis. Try to keep your navel close to your spine by drawing in your stomach.
Staff Pose - Chaturanga Dandasana
This asana is largely identical.
Its complexity depends on the correct execution. Just make it easier, but this approach will not benefit you in the long run.
- Begin this asana with weights and then slowly lower your body by bending your elbows.
- Keep your elbows close to the top.
- The legs are strong, the stomach works, the abs work. Do not lift your pelvis or bend your lower back, keeping your entire body straight.
Child's Pose - Salamba Balansana
Beautiful relaxing pose.
This asana can be practiced to relax and unwind. Connect your legs to your knees and stretch forward while lying on your feet. Stretch your arms forward and relax, breathe deeply and freely. Focus your attention between your eyebrows.
Shoemaker Pose - Baddha Konasana
In this asana you need to open your hip joints.
- Sit up straight and bring your heels as close as possible.
- Breathe deeply and calmly, relax the muscles in the pelvic area.
Lying Twist Pose - Supta Matsyendrasana
Twisting is a method of gently massaging the internal organs and helps remove toxins.
- Lie on your back, bend your knees.
- Keep your hands apart.
- As you exhale, lower your knees to the side.
- And turn your head to the other side.
- Rotate your body as if you were squeezing a towel. With one hand you can lower your knees.
Downward Facing Dog (Fly Svanasana)
This position is very common in football culture and is designed to achieve many goals during yoga exercises. It may be difficult at first, but very soon the pose will become natural enough to begin again.
Half Pose of the King of Pisces - Ardha Matsyendrasana
If you feel like you need more, this position is the one for you. This asana is named after the master: Matsyendra. In this position, the spine can be bent very deeply.
- While sitting, bend your right leg.
- Place your left foot on the outside of your right foot.
- Turn your body to the left, place your left hand behind your back and push your back with your right knee.
- Take 5 moderate breaths, then repeat the asana in the other direction.
Pigeon Pose - Kapotasana
Many people lead a sedentary lifestyle. The sitting position causes the front of the leg to shorten and weaken. Therefore, it is very important to stretch and exercise this part of the body at least once a day.
Dove asana is a good exercise for this purpose.
Kneel and bend, focusing on your arms. Bend your arms, support your forearms, and grasp your legs. Stay in this position for a few breaths.
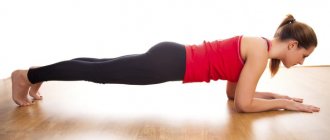
Plank – Phalakasana
Table position is not just an exercise.
- Develop concentration and balance your psyche.
- Stand with your arms and pillows raised. Bring your arms close to your body. Activate your abdominal and buttock muscles, stretch your leg muscles, no need to lift your pelvis.
- Your entire body should be straight. Breathe deeply and calmly for several breaths.
Head to Knee Pose (Yanu Sirsasana)
Seated pose.
Leaning forward is not easy for those with stiff hamstrings (and there are many of them). Janu Sirsasana is accessible to most as it only extends one leg at a time.
Garland Pose - Halasana
This pose may seem uncomfortable at first, but you'll soon realize that it's a great way to stretch your legs and release tightness in your hip area.
- Stand with your feet shoulder-width apart, toes slightly out to the sides.
- Slowly raise, bend your arms with your palms in front of your chest, place your elbows on your legs and extend them to the sides.
Bridge Pose - Setu Bandha Sarvangasana
You've probably seen this pose in a few pictures, as it's a very popular pose in yoga. Lie on your back and bend your knees.
Place your feet hip-width apart. Grasp your ankles with your hands and lift your pelvis. Stand up straight. The hands can support the body at the lower back or you can place them on the floor with your fingers crossed.
Don't tuck your chin to your chest or crane your neck.
Half Moon Pose - Anjaneyasana
This pose stretches and tightens the leg muscles. Start in Mountain Pose, then step your right foot forward. It is important that the right knee does not extend beyond the right foot, that is, the knee angle is straight.
- While strengthening your left leg, tighten the muscles so that your leg stretches like a rope.
- Stretch both arms overhead and relax your upper body, releasing tension to maintain the asana.
- Be sure to repeat the asana, changing legs.
Seated Forward Bend (Paschimottanasana)
Seated pose
This is an asana with a lot of exercises aimed at stretching the back of the leg. The fact is that in people who sit a lot, the muscles and tendons in this area become shorter, causing back pain. Stretching is great for both prevention and treatment.
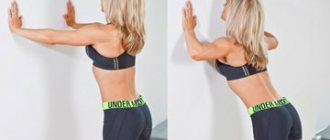
Legs up along the wall (Viparita Karani)
This pose will be a real gift for those who spend a lot of time on their feet. You can remain in this position for several minutes to regain your strength.
Right side angle - Utthita Parsvakonasana
The right side angle pose opens the inner thighs and broadens the shoulders.
- Maintain the position with your left foot back. Bend your right leg so that your knee is at a right angle. Make sure your knee does not extend beyond your foot.
- Pull your left leg like a rope. Turn your right leg to the side, extend your left arm overhead and extend your entire left side.
- With your right hand you can rest on the floor.
Half forward bend (Ardha Uttanasana)
It works quickly, but it is worth working individually. Feeling how thin your back is is part of the development of emotions. First check the position in the mirror.
Many people find that it is better to keep your hands on the floor as this provides good support even if your back is bent. If not, raise your arms higher so you can keep your back straight.
Happy Child Pose (Ananda Balasana)
Happy Child's Pose is a great way to end your yoga practice. This is also a great example of the balance between stress and relaxation in yoga. You can press your legs closer to your armpits, but only until your tailbone begins to rise from the ground. Don't go to extremes, you need to find a middle ground.
Stretch pose - Uttanasana
Literally, the name of this asana can be translated as “spinal stretch.”
- Get into a mountain position and pull your knees up. Exhaling slowly, lean forward, placing your hands on your toes.
- Don't bend your knees. If stretching allows, you should place your hands on the floor on both sides of your legs.
- You need to put your head on your knees and relax in this position.
- Stay in this position for 3-4 deep breaths.
Warrior Pose 2 – Virabhadrasana 2
An excellent asana for increasing strength and flexibility. This position opens the inner thighs. In an upright position, step one leg back and bend your front knee to a 90-degree angle.
- Rotate your front leg forward and your other leg to the side.
- Extend your arms into a small T shape so that your legs and shoulders are open.
- Repeat in reverse order.
Triangle Pose – Trikonasana
This position also applies to standing asanas.
- The back of the foot in a standing position. Rotate your front foot forward and place your back foot at a 90-degree angle forward.
- Extend your arms out to the sides in a T shape, then move sideways toward your front leg, extending your entire side.
- Touch the front of your foot with one hand or lean on your lower leg, turn your head and look towards the other.
- Repeat in reverse order.
Standing forward bends
Adho Mukha Svanasana (Downward Facing Dog)
Adho Mukha Svanasana is otherwise known as downward-facing dog . The pose begins with Tadasana and subsequent Padangustasana. Then you need to take steps back one by one until the maximum tension in your legs. It is important that your knees remain straight. The feet need to be slightly turned out. Thus, the arms and back form an upward straight line, and the legs form a downward line. A tucked stomach and an upward direction of the tailbone will make the pose correct in execution.
Prasarita Padattonasana 1
Prasarita Padattonasana 2
Prasarita Padattonasana involves the same inclination as Padangustasana, but with a wide stance . So, you need to stand in Tadasana, jump with your legs wider than your shoulders, turn your heels a little outward and bend your straight back forward. If stretching allows, then you need to clasp your ankles with your hands. Otherwise, yoga does not tolerate pain: you need to bend your arms at the elbows and place your hands on your forearms to make it easier, and in this position, stretch down. This pose is needed to stretch the legs and spine.
Simple sitting poses
Sukhasana and Stambhasana
Sukhasana is one of the simplest exercises in yoga . It is easy to perform: you need to cross your legs in front of you and stretch your arms upward with straight arms. After doing several breathing cycles, you can lower your arms, relax for a while and repeat the asana, changing the cross of your legs. Stambhasana is a slightly more complicated version. You need to not just cross your legs, but put one shin on top of the other, pressing your lower leg as much as possible to the floor. Hands should be placed on your knees. An ideal pose for performing mantras and meditation.
Virasana, Padmasana and Gomukhasana
Virasana is performed in this way: you need to kneel, legs slightly wider than shoulders . Hands should be placed on your knees. Then you need to slowly lower your pelvis between your feet, keeping your back straight. Padmasana is performed similarly to Sukhasana , but the legs are not simply crossed, but placed as close to the groin as possible. Gomukhasana – cow head pose . To begin, you need to sit up straight and slide your right foot under your left knee. The left thigh should be placed on the right shin, and the left shin should be placed next to the right thigh. Raise your right hand up and, bending it at the elbow, clasp it with your left hand. You need to keep your back straight.
Badhakanasana and Badha Padmasana
Badhakanasana is a seated butterfly pose . You need to sit up straight, feet together, knees pointing to the side. You can help your knees with your hands and, with light pressure, press them to the floor if stretching allows. Badha Padmasana is a more complicated version : you need to cross your legs, as in Stambhasana, and reach your feet behind your back with opposite hands.
Sitting twists
Marichiasana
Marichiasana is a pose named after the Indian sage . To repeat the pose, you need to sit up straight with your legs straight. Then pull your left leg towards you and grab it with your left hand from the inside, twisting to the right. Stay in this position for a short time, then lower yourself onto a straight leg with a straight back, stretching your chin over your knee. This pose is held for up to one minute. Twists are easier to perform if you see the pose clearly depicted in pictures.
Marichiasana II
Marichiasana II is performed from the same starting position , but this time the thigh of the bent leg is grabbed by the opposite hand from the outside, and the hands are clasped behind the back.
When performing breathing cycles, you need to twist more and more to the side as you exhale and maintain the position while inhaling. Since Marichiasana can be difficult for a beginner, you can simplify it a little: in the first version, do not grab with your hands, but rest them on the floor, and in the second, grab your straight leg with your hand. After twisting in one direction, you should repeat the exercise in the other.
Bends while sitting
Paschimottanasana
Paschimottanasana is known to everyone who has ever done stretching . Starting position – straight back and straight legs extended forward. While inhaling, you should stretch your arms up, and as you exhale, smoothly lower them forward, grabbing your feet. It is important to keep your back straight, stretching it from vertebra to vertebra. With each exhalation you should go a little lower. At the same time, we must not forget about straight knees and a straight back: you need to lower yourself to your feet first of all with your lower abdomen. The position is held for 30-40 seconds at the lowest possible angle.
Janu Sirsasana
Janu Shirshasana resembles the previous asana, but in practice it is easier to perform . From the starting position (sitting with your legs extended), you need to pull your right leg towards you, moving your knee to the side, and resting your foot on your thigh. Then, as you inhale, stretch up, and as you exhale, lower yourself forward, grabbing the foot of your straight leg with your hands. Here you need to pay attention to stretching: you cannot overcome severe pain, because the acceptable discomfort should be barely noticeable. Gradually, with every minute you spend in the pose, it will become easier and easier to perform the correct bend with a straight back. After performing it on the right leg, you should repeat the exercise on the left leg.
Sitting
Seated asanas are aimed at stretching the hamstrings and hips. They are performed at the end of classes, when the body is maximally warmed up and ready for stress.
Examples of asanas:
- Baddha Konasana;
- Siddhasana;
- Sukhasana;
- Vajrasana;
- Virasana.
These asanas:
- strengthen the genitourinary system of men and women;
- prevent diseases of the musculoskeletal system;
- relieve pain during the prenatal period;
- prevent varicose veins.
It is better to perform bends from a sitting position under the supervision of an instructor.
Three difficulty levels of Navasana
Navasana
Navasana is otherwise known as boat pose . To perform it, you need to sit with a straight back and grab your hamstrings with your hands. After this, while maintaining balance, you need to lift your feet off the floor and move your legs up so that your shins are parallel to the floor. Your arms should also be straightened next to your legs, stretching forward behind them. When it becomes easy to maintain this position, you need to lightly rest your hands on the floor and straighten your legs. It is important to ensure that the lower abdomen does not move away from the hips and that the back remains straight.
Navasana III
The third level of difficulty in Navasana involves straightening your arms until they are parallel to the floor . Balance should be maintained while performing the pose. Moreover, the support should be on the sit bones, and not the tailbone. Beginners may not raise their legs too high, but those whose body allows for a more difficult version should press their hips as much as possible into their lower abdomen, leaving their back perpendicular to the floor. After performing Navasana, you should relax your body in Sukhasana.
Basic lying poses
Shavasana
Savasana is included in the easiest and most famous asanas in yoga . Corpse pose usually ends a hatha yoga class - you need to lie on your back, arms at a comfortable distance from the body, muscles relaxed, and eyes closed. However, in the middle of the class you should practice other asanas that are performed lying down.
Supta Padangusthasana
The simplest of them is Supta Padangushthasana . In a lying position, you need to pull your knee to your stomach and clasp your foot with your hands. As you exhale, the leg straightens, the heel looks clearly upward. After holding this position, you need to release one hand and move your leg to the side, keeping the knee straight. The gaze is directed in the direction opposite to the leg. If there is insufficient stretch, a belt is used.
Matsiasana
Matsiasana is a pose that develops spinal flexibility . In a lying position, legs together, you need to rest your elbows on the floor, gradually lifting your back off the floor. In this case, the top of the head does not come off the surface, but the weight of the body is transferred not to the head, but to the elbows and feet. With each exhalation you need to open your chest more and more and stretch your back up. Even if the backbends have a detailed description, it is better to do them under the supervision of an instructor so as not to harm the spine.
Lying twist
The first lying twists are performed as follows : you need to lie on your back, pull your knee, clasping it with your hands, and then lower it to the floor near the opposite leg.
The arms are directed to the sides, and the head is turned in the direction opposite to the knee. You can stay in this position for a few minutes, after which you should change legs. It is important that the buttocks, lower back and shoulders should not come off the mat.
Where to start classes
Many beginners do not even realize that they performed some asanas for beginners in physical education classes at schools. It’s just that teachers rarely emphasize that such warm-ups are yoga poses.
There are a lot of asanas in yoga. But which of them to choose for a beginner can be decided by the instructor or the attending physician.
Before classes, you must prepare and adhere to the following recommendations:
- undergo a medical examination and obtain the doctor’s consent, especially if you have chronic diseases;
- people with high blood pressure should not include poses that involve their heads down;
- It is necessary to start classes only with an instructor, even if there are no prohibitions;
- home lessons are allowed after several with an instructor;
- you cannot perform asanas just by looking at a picture;
- before performing it is necessary to take comfortable, simple poses (Siddhasana, Sukhasana);
- no external stimuli should distract;
- get ready to do it, and if you are in a bad mood, give up.
Trust your own body, improve your personal practice daily.
Simple inverted poses
Usually, inverted poses are left for the end of the class, because the body is already warmed up and the risk of injury is minimal. At the end of the lesson, a person will have maximum control of the body and control the muscles, making it easier to master more complex hatha yoga asanas. In general, inverted poses are beneficial for the human body. They help you relax after a working day and gain energy if performed in the morning.
Sarvangasana
Mastering inverted poses should begin with Sarvangasana - candle pose . To perform it, lie on your back and press your thighs to your stomach. After several rolls on your back, you need to lower your palms to your lower back and gradually straighten your legs up, resting on your elbows and upper back. The neck should be maximally unloaded throughout the entire asana - one minute.
Halasana
From Sarvangasana, advanced yogis move to Halasana - plow pose . Straightened legs should be lowered behind the head and arms extended behind the back. In this case, the fingers should be intertwined with each other and turned outward. Again, the main load should fall on the shoulder joints, and not on the neck. The back should be kept straight. You can also take Halasana from a lying position with your knees pressed to your chest. After performing several rolls, you need to move your legs behind your head and straighten them. At first, your feet can rest against the wall, eventually falling lower and lower.
How to learn to perform asanas correctly
Find an instructor
The instructor will explain which muscles or parts of the body should feel tense and which should remain relaxed. The teacher will help you master proper breathing and “energy locks” that stimulate the functioning of your internal organs.
In the end, you can always turn to him with the question of whether you feel right in the asana, whether any muscles and ligaments should tense or hurt, or whether your tension is unnecessary.
Of course, not all yoga instructors have the necessary knowledge and skills. Here are some tips on how to find a good instructor.
- He should rebuild your body, correct each asana, and tell you what sensations should arise when performed correctly. If your instructor simply demonstrates the asana without leaving his mat, what is the point of studying with him? It will be cheaper to download the application.
- He should answer your questions. If the instructor doesn’t know what sensations should arise during an asana, doesn’t understand why your lower back is straining even though it shouldn’t, and doesn’t know what to tell you, you should think about his competence.
- It should not evoke negative emotions. A person can know and be able to do a lot, but at the same time remain unpleasant in terms of communication and teaching. Maybe for some this is not so important, but, in my opinion, negative emotions will prevent you from focusing on your body and correctly performing asanas. After all, exercise should be fun, right?
Focus on sensations
If you consider that for the correctness of the asana it is important that it looks exactly like in the picture, you can use a mirror during practice to adjust. However, many argue that the mirror, on the contrary, harms the practice, since it interferes with focusing on the sensations of the body. And this is of decisive importance: the instructor says what you should feel in the asana, but you must track your personal sensations yourself.
Once you have mastered the concept of correct movement, you can practice without an instructor, but at the same time, you should be even more focused on your sensations.
Examine your post-workout state
To understand whether a sport, a particular instructor or training method is right for me, I always listen to how I feel after class.
Notice if there is any tension or pain in your body, and if you feel relaxed, warm, and content. Note your general condition: loss of strength or, conversely, a surge of energy?
I believe that if the exercise is beneficial, it should feel good after the workout. If you feel your body light and fit, feel a surge of strength and vigor, then the lesson was not in vain.
Headstand
Salamba Sirsasana
Salamba Shirshasana is performed in hatha yoga, but requires the presence of an instructor . You can also master it on your own, but only after long training and after achieving a high level of physical fitness. To begin with, you should kneel and elbows, clasping the latter with your hands. Then release your hands and interlace your fingers. Place your head on the floor and straighten your legs at the knees, resting only on your toes and elbows. Stretching your tailbone up, you need to bring your feet closer to your head, pressing your hips to your stomach.
When this position becomes easy, you can move on to the next stage - lift your legs off the floor and press them bent to your body. The shoulders go as far away from the head as possible, and the main emphasis is on the elbows. Over time, this stage becomes more complicated - the legs can be straightened at the knees, pointing them upward. At first, it is enough to maintain this position for just a few breathing cycles. Over time, the headstand can be extended to 7-10 minutes. You can learn Salamba Shirshasana against a wall - this will greatly facilitate the process.
Sun Salutation – Moon Salutation
Surya Namaskar
Sun Salutation (Surya Namaskar) is a set of asanas that can be performed as a warm-up before class or morning exercises after waking up.
For lovers of evening hatha yoga, the asana complex Salutation to the Moon (Chandra Namaskar) is available, which should be performed in the evening or as a good warm-up.
You can learn more about both complexes in the next article.
Groups of asanas and their meaning
There are quite a lot of them. Only a few manage to study and master everything. It is better to choose the most optimal options and include suitable yoga poses in your complex.
When creating an individual complex, it is necessary to include various groups of asanas:
- standing;
- sitting;
- lying down;
- bridges;
- for balance.
But if fatigue is present, then the exercises must be stopped or replaced with an easier asana.
Normalization of breathing, restoration of muscle tone, improvement of all organs and systems - this is the main purpose of yoga.