Doing 50 pull-ups at one time seems like an impossible task, however, many people spend many months achieving this goal to no avail. To speed up the process of completing such a complex standard, fitness trainer from the USA Brett Stewart developed his own unique method of 50 pull-ups for 7 weeks, which allows you to receive the correct progressive load while still having time to restore strength.
Features of the 50 pull-up program
In his methodology, trainer and author Brett Stewart provides programs for beginners who do at least 5 pull-ups, and advanced athletes who perform at least 12 pull-ups. The author of the method advises sticking to three training days a week, which are performed every other day (for example, Mon, Wed, Fri.), and two days of rest in a row for full recovery. It is recommended to warm up before starting the complex, warming up the muscles and joints to avoid injury. At the end of the complex, you should stretch the muscles of the back and arms, this will speed up recovery and prevent muscle tightness. The rest between approaches (exercises) is one to one and a half minutes, but if this time is not enough for recovery, you can listen to your own feelings.
Read more about post-workout stretching →
Pros of the program
- The program is intended for both beginners and advanced.
- The workouts include a progressive load that motivates you to do more and more pull-ups with each workout.
- There are all kinds of grips that comprehensively prepare the muscles for heavy loads, making it easier to cope with a large number of pull-ups.
- The number of rest days provides the muscles with enough time for partial and complete recovery, without slowing down progress, and at the same time, does not overwork the muscles.
Minuses
- The course does not include learning pull-ups from scratch, but you can use as a basis a plan for the number of workouts and rest days per week, as well as grip methods.
- Not everyone can handle a strictly prescribed number of repetitions, so you may not see results in seven weeks, and the program may take much longer or not lead to the goal in the eighth week.
Read more about how to do pull-ups correctly →
How to do pull-ups on the horizontal bar correctly
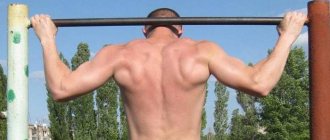
Before we talk about how to learn how to do a lot of pull-ups on the horizontal bar and what exercises are needed for this, you need to master the correct technique for performing the element.
So, let’s divide the execution technique into three periods:
1. Beginning
Place your hands on the horizontal bar slightly wider than shoulder width or shoulder width apart. Wrap your fingers tightly around the bar. Squeeze your shoulder blades, pull in your stomach, straighten your body. Make sure to keep your neck tucked into your shoulders and your shoulders down. Your arms should be completely straight. In this case, you need to constantly keep your back tense. The body should not sag. It is from this position that we begin our ascent.
2. Middle of the exercise
As you inhale, slowly lift your body up, placing your chin over the bar. Don't forget to watch your shoulder blades. They need to be pulled back and down as the elbows move towards the ribs.
3. The very top
Once your chin is above the bar, you don’t need to immediately drop down. Hold for a few seconds. At the same time, try to pull your chin even more and squeeze your shoulder blades. The abs and buttocks should remain tense. Make sure that your shoulders do not move forward in front of the horizontal bar.
Correct execution of the element excludes:
- swaying and writhing of the body;
- deflection of the lower back and arching of the back;
- pressing the head into the shoulders and straining the neck.
Initial load level
1 Week
| Training day | Straight grip | Reverse hv. | Neutral/narrow hw. | Arr. hv. | Straight. hv. |
| 1 | 5 | 4 | 5 | 4 | 3 |
| 2 | 6 | 5 | 5 | 6 | 4 |
| 3 | 5 | 6 | 6 | 5 | 5 |
2 week
| Training day | Direct hv. | Arr. hv. | Neutral / narrow hv. | Arr. hv. | Straight. hv. |
| 1 | 6 | 5 | 4 | 6 | 5 |
| 2 | 8 | 5 | 5 | 4 | 4 |
| 3 | 5 | 9 | 5 | 5 | 5 |
3 week
| Training day | Direct hv. | Return hv. | Neutral / narrow grip | Arr. hv. | Wide hv. |
| 1 | 8 | 6 | 5 | 6 | 2 |
| 2 | 8 | 7 | 6 | 5 | 2 |
| 3 | 10 | 6 | 7 | 8 | 2 |
4 week
| Training day | Straight. hv. | Arr. hv. | Neutral / narrow hv. | Arr. hv. | Shir. hv. |
| 1 | 8 | 10 | 6 | 6 | 2 |
| 2 | 11 | 6 | 8 | 6 | 2 |
| 3 | 10 | 10 | 10 | 6 | 2 |
5 week
| Training day | Straight. hv. | Arr. hv. | Straight. hv. | Arr. hv. | Straight. hv. |
| 1 | 10 | 9 | 10 | 7 | 6 |
| 2 | 11 | 10 | 9 | 7 | 5 |
| 3 | 14 | 12 | 11 | 9 | ——— |
week 6
| Training day | Straight. hv. | Arr. hv. | Neutral / narrow hv. | Arr. hv. | Straight. hv. |
| 1 | 11 | 12 | 11 | 10 | 10 |
| 2 | 15 | 12 | 10 | 9 | 9 |
| 3 | 17 | 15 | 12 | ———- | ———- |
week 7
| Training day | Straight. hv. | Arr. hv. | Neutral / narrow hv. | Arr. hv. | Straight. hv. |
| 1 | 14 | 16 | 10 | 10 | 10 |
| 2 | 15 | 15 | 10 | 10 | 10 |
| 3 | 14 | 13 | 12 | 11 | 10 |
8 week
By this time, the muscles have managed to adapt to pull-ups, there is more strength, and the athlete is ready to move to an advanced level. After the end of 7 weeks, you need to perform the maximum number of pull-ups according to the plan of the first week in 1-3 days.
How to learn to do a lot of pull-ups on the horizontal bar: scheme of actions
To master pull-ups from 0 you need to do the following:
1. Set a goal
Those. if you want to do 10 pull-ups in 15 days, write about it.
2. Make a clear action plan
It should include everything: from lead-in exercises and their technique to the number of approaches and training regimen.
3. Do at least one pull-up correctly.
Only after you have mastered the correct execution of the element can you move on and increase the number of repetitions.
4. Increase the number of repetitions evenly
Add at least one repetition every day.
For beginners, you can propose the following scheme for achieving your goal, say, in one month:
| Day, week | Action |
| First day | Hanging on a bar, imitation of a pull-up, consisting of a slight lifting of the body with a delay at the top point. |
| First week | Full pull-ups with the support of a partner or with support on a stool. |
| Second week | A negative variation of the element that places the main emphasis on the descent technique. We need to take a position as if we had pulled ourselves up and begin a slow descent. |
| Third week | Alternate exercises from the first and second weeks. |
| Fourth week | Full pull-ups with a gradual increase in the number of repetitions to achieve your goal. |
What equipment can be used
In addition to using a stool or other elevated position, you can use auxiliary equipment to make the task easier, including TRX loops and an expander. Loops perform well when working with your own weight and allow you to master the element even faster.
Learning to pull yourself up with an elastic band
Expanders or rubber loops are widely used in mastering pull-ups. There is even a whole technique for performing an element with their help.
The technique consists of attaching one end of the elastic band to the crossbar and securing the other to one or two legs. The expander will take on part of the exerciser’s weight and help lift the body up.
To achieve maximum effect, you need to try your best, doing the last repetition at the limit of your ability. As soon as doing pull-ups with an elastic band seems easy, move on to performing a regular element. With the help of an expander, you can master both narrow and wide grip.
More information in the video:
Advanced level 50 pull-ups in 7 weeks
1 Week
| Training day | Straight. hv. | Arr. hv. | Straight. hv. | Arr. hv. | Arr. hv. |
| 1 | 12 | 10 | 9 | 9 | 8 |
| 2 | 12 | 10 | 10 | 9 | 9 |
| 3 | 13 | 10 | 10 | 9 | 8 |
2 week
| Training day | Straight. hv. | Arr. hv. | Straight. hv. | Arr. hv. | Arr. hv. |
| 1 | 15 | 11 | 10 | 9 | 8 |
| 2 | 15 | 12 | 11 | 9 | 8 |
| 3 | 14 | 13 | 12 | 11 | 9 |
3 week
| Training day | Straight. hv. | Arr. hv. | Straight. hv. | Arr. hv. | Arr. hv. |
| 1 | 15 | 14 | 10 | 12 | 10 |
| 2 | 15 | 14 | 11 | 13 | 10 |
| 3 | 14 | 14 | 14 | 12 | 11 |
4 week
| Training day | Straight. hv. | Arr. hv. | Straight. hv. | Arr. hv. | Arr. hv. |
| 1 | 17 | 10 | 16 | 10 | 14 |
| 2 | 14 | 19 | 11 | 13 | 9 |
| 3 | 19 | 13 | 14 | 13 | 11 |
5 week
| Training day | Straight. hv. | Arr. hv. | Straight. hv. | Arr. hv. | Straight. hv. |
| 1 | 22 | 13 | 11 | 10 | Maximum |
| 2 | 24 | 10 | 11 | 13 | Maximum |
| 3 | 26 | 10 | 11 | 10 | Maximum |
week 6
| Training day | Straight. hv. | Arr. hv. | Straight. hv. | Arr. hv. | Straight. hv. |
| 1 | 30 | 15 | 10 | 15 | Maximum |
| 2 | 33 | 16 | 11 | 13 | Maximum |
| 3 | 35 | 10 | 11 | 10 | Maximum |
week 7
| Training day | Straight. hv. | Arr. hv. | Straight. hv. |
| 1 | 30 | 22 | Maximum |
| 2 | 34 | 20 | Maximum |
| 3 | 19 | 13 | Maximum |
8 week
After completing the seven-week plan, you need to complete 50 pull-ups.
If you can do no more than 45 pull-ups, perform the complex for 7 weeks, after which try again to do pull-ups as many times as possible. And so on until you reach the main goal.
Options[edit | edit code]
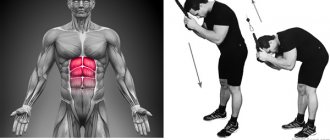
When people talk about variations of pull-ups, they usually mean weights. Do not fall for this bait - weights in pull-ups (as, indeed, in all other exercises) are the main cause of injury. They also (and this is especially true for pull-ups) produce strength that is difficult to use in everyday life. Despite the fact that there is less muscle mass on the back than on the legs, the back has the most complex structure. The back muscles can be divided into four groups: the spinal muscles (the erector spinae muscles, the lumbar muscles), the back muscles (the latissimus dorsi muscle, which occupies the entire lower part of the back), the upper back muscles (the rhomboid, teres major and minor, and the middle trapezius muscle between the shoulder blades, rear deltoid, etc.) and upper trapezius muscle (large muscles in the neck/shoulder area). Rest assured that by the time you incorporate pull-ups and bridges into your routine, all of these muscles—and more—will be receiving maximum stimulation. If you need to work all the muscles of your body during a workout, you can perform only these two exercises. However, if there is a need to vary your workout or to recover from an injury, you can practice some of the pull-up-based exercise variations presented below.
Dips[edit | edit code]
Push-ups are usually thought of as a type of press that works the chest and triceps. But the latissimus dorsi muscle also receives a colossal load at the bottom of this movement. I've met guys whose backs hurt more after doing push-ups than after doing pull-ups. Stand between parallel bars - or a pair of chairs, and lean on them with straight arms. Lower yourself by bending your elbows until they form a right angle, pause at the bottom point for a second, and then slowly rise up. Bench push-ups (feet on the floor) work the back muscles, but to a lesser extent because the body weight is supported by the legs.
Guard pull-ups[edit | edit code]
I am sure that any workout must include at least one intense, fast exercise. Guard pull-ups are the best way to “delight” your muscles with variety. Start doing full push-ups, pull yourself up, but don't stop at the top, but continue to pull yourself up until your arms are completely straight and the bar is at hip level. Try to perform the upward movement smoothly, without jerking. An intense pull-up perfectly trains the biceps and back, while a smooth downward movement develops the elbows, forearms and hands. The final part of the exercise intensively engages the same muscles as dips - triceps, chest muscles and latissimus dorsi. In the lower position, your arms should be straight. At first you will need to jump sharply to start the movement, but over time your movements will become smoother. In some circles this exercise is called a “strength exit.” The first time I heard about this technique was in San Quentin. The origin of the name of the exercise is not entirely clear, but perhaps the guards pulled up in order to inspect the entire territory they were protecting. If you know where the legs come from, that is, in this case, the arms, let me know.
Reverse elbow push-ups[edit | edit code]
A little-known but very effective exercise. Lie on your back on the floor, stretch your arms along your body, while your elbows should be at some distance from the body. Raise your forearms perpendicular to the floor, keep your body straight, legs together. Using your elbows, pull yourself up until you're standing on your heels and elbows—if you're strong enough. At first it will be difficult to lift your body off the floor, but over time you will be able to rise a few centimeters up. Tighten every muscle in your body and control it. When lifting, only your elbows and heels should touch the floor. Slowly lower yourself to the floor and then repeat the exercise. You can put towels under your elbows; if it hurts to lean on, clench your hands into fists. The exercise works well in the middle part of the back, and the muscles that hold the spine receive an isometric load. This is essentially a pulling motion, but without the use of external weight. Since the arms do not actually work, the back receives the main load, so the exercise can also be used during recovery from arm injuries.
Rods on the grid[edit | edit code]
Prisoners have used the bars of their cells for strength training for centuries. A grid and a little ingenuity, and you can come up with hundreds of different exercises that will provide not only dynamic, but also isometric load. You'd be surprised at how varied the grid rows can be: I must have a list of about a hundred techniques in one of my old notebooks. These are great exercises for developing your back, so I'll limit myself to describing one back workout that consists of several useful techniques.
Heavy pull
. Grasp the bars at chest level, forearms parallel to the floor, fists at a distance equal to the space between the bars, approximately 15 cm from each other. Your arms will be bent tightly so that your body is just a few centimeters from the bars. This is the most effective position for deadlifting. Start pulling hard on the bars, as if trying to push them apart, and if you manage to bend them even a little, you are on the right track. This is a great exercise for the arms and shoulders, especially the muscles between the shoulder blades. It also develops traction force well. During the exercise, breathe normally, perform deadlifts for 5 seconds, then rest for 10 seconds and repeat the next set for 5 seconds.
Archer
. Grasp the upright with both hands. One hand should be at eye level, the other at chest level. Keep both arms slightly bent at the elbows, so that the distance between the body and the counter is approximately two-thirds of the length of the arms. Push with your top hand and pull with your bottom hand, as if you were shooting a bow. Perform the exercise for 5 seconds, then quickly change the direction of application of force: pull towards you with your top hand and push away from you with your bottom for 5 seconds. Then rest for 10 seconds and switch hands. Repeat and complete the cycle. Do four more cycles. This exercise trains all the muscles of the core; changing the position of the arms has a good effect on the latissimus dorsi muscles.
Cross thrust
. Let's say you've worked hard on all the exercises and can boast of impressive back muscles. But there is one more exercise that must be completed. So, stand up straight, raise your arms straight so that your body position resembles a cross. And in this position, grab the bars with your hands. Press your chest against the bars. Now - without moving your elbows - pull the bars back with all your might. Due to your position, your body will not be able to provide enough force, but don't give up trying. If you do the exercise correctly, you will feel a tightening and burning sensation in the small muscles on your back near your arms. These are the rear deltoids - the ones responsible for stability of the entire shoulder girdle and are vital for strength training of the back. Perform deadlifts by squeezing your back muscles as hard as you can for 10 seconds, then rest for 5 seconds and repeat. Do the exercise five times. Cross rows are best done at the end of your workout, and although you'll be sweaty and sore afterwards, this exercise requires no supplementation and takes no more than a minute to complete.
This exercise is a great example of a full isometric upper back workout. Isometrics does not replace bodyweight exercises, but their combination gives excellent results. Both techniques go together like a cold beer and a hot day. When performing pull-ups on the horizontal bar, it is very easy to track the work of each muscle. By changing the position of your arms or the tilt of your body, you can create a training program in such a way that each exercise will be aimed at a separate muscle group. Don’t get hung up on the door bar, improvise: try using door jambs, heating pipes, corners in the room, window frames, etc. as support. You’re not sitting in a cell - use all suitable objects; fences and handrails, for example, are excellent improvised tools.
Regular grip
The technique of pulling up on a horizontal bar with a regular grip is a standard exercise. Every athlete must master it. In this case, the grip width should be slightly larger than the width of your shoulders. When lifting, touch your chin to the horizontal bar. With this pull-up, you can use the muscles of the abs, back, forearms and biceps. Anyone who wants to learn how to do pull-ups from scratch should start with this exercise. Because his technique is quite simple. Therefore, the exercise does not require such physical preparation as with other types of grips.
Correct technique
The pull-up technique on the horizontal bar includes several very important rules. They will be the key to proper training:
- The grip must be very strong. Grasp the horizontal bar as firmly and comfortably as possible.
- Perform the exercise only using your muscles. Do not jerk or push. Incorrect technique is not only ineffective, but also dangerous.
- Make the ascent and descent very smooth. The slower the better. Avoid jerking.
- With each repetition, the chin should be above the horizontal bar. Only in this way will the exercise be considered correctly performed.
- Don't lose your breath. Remember that on the way up you need to exhale, and on the way down, on the contrary, inhale.
- Pay attention to the body. During pull-ups, it should be in an upright position.