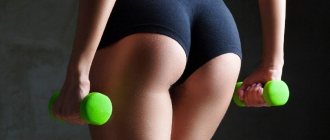
Lower body exercises
1.Front squats
Stand on an elastic band with your feet shoulder-width apart. Hold both handles or ends of the resistance band above your shoulders. If the resistance band is too long, cross your arms over your chest while holding the handles. As you begin your squats, keep your back straight, tighten your abs, and bring your knees behind your toes as you squat. Return to the starting position and repeat 8-12 times.
Raising your legs in front of you
Attach the elastic expander to a knot (for example, to a machine in the gym), while fastening the other end of the elastic band around your ankles. Move far enough away from the knot to feel resistance, and place your feet hip-width apart. Shift your weight to your left leg and lift your right leg, while raising your knee until it is in front of you . Slowly return to the starting position and repeat 8-12 times before changing legs.
Raising your legs behind you
Lie on your stomach and secure an elastic band around your right ankle, while securing the other end of the rubber band to a door, for example. Move away from the door until you feel resistance. Tighten your abs, bend your knees and begin to move it backwards, while reaching your butt with your heel. Slowly return your leg to the starting position and repeat the exercise 10-15 times before changing legs.
Bridge to strengthen the gluteal muscles
Tie a resistance band around your legs above your knees. Lie on your back with your new knees bent (90 degree angle). Raise your hips off the ground while placing your arms along your body. During this exercise, try to tighten your gluteal muscles as much as possible. Repeat 15-20 times.
Standing Lunges
Attach a resistance band to a stable object at ankle height and stand with your left side facing the object while wrapping the other end of the resistance band around your right ankle. Move away from the support until the expander is tensioned. From this wide position, lunge to the side, while trying to tense the leg that you have not secured as much as possible and tighten your hips well. Slowly return to the starting position and repeat 12-15 times before switching sides.
Snail (Supinated clamshell)
Secure a resistance band around your legs above your knees. Lie on your back with your hips and knees at a 90-degree angle. Spread your legs, knees away from you, while tightening your gluteal muscles for 2-3 seconds. Slowly return to the starting position and repeat the exercise 10-12 times.
Ankle stretch
Secure an elastic band around a support (such as a table leg) and sit down with one straight leg. Under the top of that leg (just under the toes) secure the other end of the elastic. Slowly pull your ankle toward you while keeping your hands on the ground. Your big toe should be pointing towards your knee. Pull your ankle until you feel a pleasant muscle tension. Slowly return to the starting position and repeat 10-12 times on each side.
Side steps
If you have a rubber band, wrap it around your ankles. Spread your feet shoulder-width apart to receive resistance on the resistance band. With your knees slightly bent, shift your weight to your left leg and step sideways with your right foot. After this, move your left leg slightly towards your right, but do this in such a way as to keep the resistance band under tension. Take 8-10 steps before you start taking steps in the other direction.
Raising legs to the sides while standing (Standing Abduction)
With this exercise you also train your balance. Attach an elastic band at ankle height. Lift one leg slightly off the ground and move it to the side to create resistance from the elastic band. Try to tighten your gluteal muscles as much as possible. Slowly return your leg to the starting position after holding it in the air. Repeat the exercise. If you don't feel confident, you can hold on to a table or wall to keep your balance. Repeat 15-20 times on each side.
Raising the legs to the sides in a sitting position (Seating Abduction)
Sit at the end of a chair or bench and secure an elastic band above your knees. Spread your legs a little further than shoulder-width apart and alternately pull your knees out to the sides, with your feet pointing inward. Stay in this position for 2 seconds and then return your knees to the starting position. Repeat 15-20 times.
Exercises with an expander for men - basics and loads
You can exercise with an expander anywhere - it is compact, convenient, takes up little space, and most importantly - very effective.
Visually, this simulator consists of two handles that are connected by a spring or elastic bands.
Depending on the desired effect and level of training, you can set the required load. A beginner should start with a load at which he can perform 10-15 repetitions at a time.
A prerequisite for the effectiveness of exercises with an expander is a gradual increase in load.
First you need to increase the number of repetitions, then approaches. And only when the exercises are performed with virtually no effort can you increase the load by adding one band or spring. But the number of approaches and repetitions should be reduced again.
So, we can highlight 5 basic principles for working effectively with an expander:
- You should never neglect warm-up exercises.
- The load level should be increased gradually.
- Quantitative indicators of exercise performance should not exceed qualitative ones.
- Between sets you need 1-2 minutes to regain strength and take a breath.
- The load should be selected depending on the level of training and physical development, as well as natural data.
Back exercises
Perpendicular thrust
Stand on the middle of the resistance band with your feet shoulder-width apart. Bend slightly towards your knees while keeping your back straight. Take the handles of the expander in both hands. In this position, pull the expander to your sides and bring your shoulder blades together. Elbows at a 90 degree angle. Return to the starting position and repeat 10-12 times.
Seated row
Spread your legs slightly and place the resistance band on the ball of your foot. Secure the expander on both sides, extend your arms and pull your palms towards you. Sit up straight and pull the expander towards your stomach, keep your elbows bent and your shoulder blades together. Slowly return to the starting position and repeat 15-20 times.
Raising arms in a standing position
Stand with your feet shoulder-width apart and your knees slightly bent. Take the middle part of the elastic band with both hands at shoulder height with your palms facing you. As you straighten your arms, pull the expander forward and then back. Until you feel pressure in your shoulder blades. Return to the starting position and rest. Repeat 8-10 times.
Lying row
Secure the middle of the expander with a knot (for example, to a simulator). Take a lying position and slightly bend your knees. With your arms extended behind your head, grasp the handles of the resistance band and slowly pull it with your arms outstretched (just bend your elbows slightly) across your chest toward your knees. Slowly return to the starting position and repeat the exercise 8-10 times.
Craving for the ground
Are you ready to train your upper body? Secure the resistance band horizontally above you. Bend your knees and grab the other end of the resistance band in your hands. Keep your hands behind your head, shoulder-width apart. With your elbows bent, pull the resistance band towards the ground, while you should feel your back muscles. When your hands touch your shoulders, return to the starting position and repeat the exercise 10-12 times.
Determine the purpose of the training[edit | edit code]
Before starting regular training, first of all, determine your training goal. Depending on the goal, a set of exercises, load level and effective number of repetitions are selected.
If your goal is to lose weight, strengthen muscles
, improve posture and flexibility, then a set of exercises is selected for all muscle groups with an emphasis on problem areas - the abs, chest, legs, back, arms or shoulders. Be sure to start your exercises with a warm-up for 7-10 minutes, including aerobic and cardio exercises. The duration of the main workout is 15 – 30 minutes. Build your workout so that you train the largest muscles first - your legs and back. Perform the exercises at a fast pace, while trying to pause for a second at the moment of maximum muscle contraction. The optimal number of repetitions of each exercise is 15-20 times with intervals between sets of 30 seconds. Finish your workout with stretching and breathing exercises.
If your goal is to build strength and muscle mass
, then the training is based on the same principles as in exercises with free weights. Begin your workout with a warm-up for 10-15 minutes, including aerobic, cardio, light-impact exercises and stretching. The duration of the main workout is 20 - 30 minutes. Build your workout so that first of all you train the largest muscles - the legs and back. Perform the exercises at a slow pace, tensing your muscles well. Having achieved maximum muscle contraction, pause for a second, then smoothly return to the starting position. The required number of repetitions of each exercise to build muscle mass is 6-15 with intervals between sets of 60-90 seconds. If you do less than 6 repetitions, you develop strength, and if you do more than 15, then you develop muscle endurance. Finish your workout with stretching and breathing exercises.
To achieve the desired results, be sure to increase the number of repetitions or load level by at least a little each week. Adding a yellow tube to the operating resistance is ideal for these purposes.
Chest exercises
Push ups
Take this classic exercise to the next level! Get into a plank position and secure a resistance band across your upper back. Hold both ends of the resistance band with your hands and place your hands in the starting position - head and body pointing towards the ground. Tighten your gluteal muscles, abs, and perform a push-up with your arms fully extended. Keep your lower back straight and pull your chest toward the ground. Repeat 5-20 times.
Lateral traction
Next stop: the upper chest! Stand straight with your knees slightly bent and place a resistance band under your feet. Take both handles in your hands and pull them to shoulder height. After this, pull the resistance band up through your chest to your sides (“to the arc position”) until your arms are fully tense. Return to the starting position and repeat the exercise 10-12 times.
Bench press
No dumbbells? No problem! Place an elastic band under the ab bench and lie face up. Take the handles of the resistance band and lift them to shoulder height, so that your fingers touch your shoulders. Extend your arms forward and try to achieve full arm tension. Return to the starting position and repeat the exercise 10-12 times.
Standing row
Secure an elastic band around a support (for example, a gym machine) at chest height. Take the handles of the expander and turn your back to the support. With your elbows slightly bent and your palms facing you, pull the resistance band in front of you while extending your arms as far as possible. Return to the starting position and repeat the exercise 12-15 times.
Training program with wrist expander
Hands are one of the foundations of human strength, endurance and productivity. That is why you need to pay special attention to them when training.
A wrist expander (benefits and harms will be discussed below) is one of the most effective equipment for training hands.
What does this simulator give? Its benefits are due to the fact that, by working the muscles of the fingers, wrists and forearm area, it guarantees our body powerful grip strength.
The grip, in turn, is the main component not only of any training with weights, but also helps us in everyday life (bringing heavy bags of groceries, carrying a suitcase on vacation).
Be sure to check out: 3 effective methods of training with a wrist expander
What muscles does the wrist expander develop? Many people mistakenly believe that when working with this apparatus, only the muscles and joints of the fingers are loaded. In fact, the correct technique for performing the training will allow you to feel the functioning of:
- Finger flexors;
- Muscles of the hand;
- Muscles and joints of the wrists;
- Anterior part of the forearm region.
All these parts of the muscle group allow you to fully productively work with weights; they are the ones that are pumped by the expander. If undeveloped muscles are immediately loaded with weight, then, not knowing how the load should be distributed correctly, the beginner will get a sprain, bruise or even a hernia instead of the treasured back wings.
What else is a wrist expander used for? The load from the projectile is beneficial not only for the arm muscles, but also for the entire body as a whole. It has long been proven that when working on the hands and palms, both the trained area and the brain together with the nervous system come into tone. A productive brain and a balanced psyche are the key to the health of the whole body.
Attention!
We recommend watching the following video, in which Denis Borisov explains why this projectile is useful:
This device has many positive properties. We'll look at the 10 most important ones.
How to pump up your arms quickly so that they look attractive? This question will interest any man who takes care of his body or simply wants to give his hands an excellent shape.
This approach to training is wrong. The development of each muscle group occurs more effectively when there is a proportionate load on the entire muscle complex. Ignoring targeted forearm training is a delaying factor for overall muscle growth.
To begin with, you can take your hands, which allow you to make the volume of your hand larger and create the impression of a person who doesn’t seem to leave the gym. The muscles of the hand are actively involved in many physical exercises. They are used both during any training and without them.
In addition, with pumped up hands your tenacity increases. Many people know that the hands are involved in any exercise, but still, additional training on them never hurts.
A wrist expander is the best way to prepare children for strength training. Correct exercises with a moderately hard expander develop the muscular system, strengthens bones, ligaments and tendons. Proper training with a wrist expander is a contribution to the physical development of the child, as well as the prevention of fractures, dislocations and other injuries that affect children with a weak musculoskeletal system.
It is recommended to start any sports activities with the easiest form, during which the load is minimal. All workouts with an expander are based on the following principles:
- mandatory warm-up with soft equipment;
- the number of repetitions for beginners should not exceed 15 times;
- breaks between classes should be sufficient for muscle recovery;
- maximum rigidity is selected individually;
- the load should increase gradually;
- exercises with a wrist expander to strengthen your grip are performed at the end of training or on rest days. You will read about it below;
- regularity of classes.
The listed rules are required to be followed. If you have problems choosing a simulator based on rigidity, you should consult with an experienced athlete or coach.
The grip strength program is based on the principle of regularly increasing the number of repetitions and sets. You should use a simulator with such a resistance force that the number of compression repetitions does not exceed 8 times.
Example program:
- Day 1 – squeeze 4-6 times, perform 10 approaches with a 2-minute break between them.
- Day 2 – similar to the first, but the number of approaches increases to 11.
- Day 3-4 – 12 approaches.
- Days 5-19 – the number of compression repetitions increases to 6-8 times, 12 approaches with a break of 2 minutes.
- Day 20 – a “unit” with high resistance is used (determined individually according to the same principle: the maximum number of compressions is no more than 8), 4 repetitions, 10 approaches with a rest of 2 minutes.
@ FXQuadro/IStock
To start, you can take hands, which allow you to increase the volume of your hand and create the impression of a person who doesn’t seem to leave the gym. The muscles of the hand are actively involved in many physical exercises. They are used both during any training and without them.
Also, with pumped up hands, your grip increases. Many people know that the wrists work in any exercise, but additional training never hurts.
@ Toxitz/IStock
A special expander will help pump up your hands and give you strength in your hands. In addition, this tool will help pump up not only your hands, but also your wrist muscles.
There are several types of devices such as expanders. They are all very comfortable and practical. For example, you can put it in your backpack and keep fit anywhere. Basically, expanders are divided into the following types:
- Carpal - intended for working out the hands and forearms. They are small rubber rings or specially shaped levers with 2 handles.
- Pectoralis – they are designed for training the pectoral muscles and are a set of springs and cords connected by handles.
- Universal - they are a wide, long tourniquet, most often used during group fitness classes.
You can purchase such a tool at any sports store. They are available in a variety of shapes and designs. In addition, there are special models with a special counter. If the expander is too light for you, you need to buy a stiffer one so that your arm can swing normally.
1.You need to place your feet shoulder-width apart, and raise your arms with the expander in front of you so that your palms are turned inward. Then spread your arms straight to the sides and inhale, then return to the original position and exhale. When you do this exercise, try not to lean back too much and try to look in front of you all the time.
3. Now you will need to place your feet shoulder-width apart, raise your arms with the expander up, palms out. Move them to the side, without bending your arms, so that the springs are behind your back, and inhale. Raising your arms up, you need to return to the original position and exhale.
5. We get back to the original position again. But now we must move the expander behind our back so that our arms are bent and our palms face outward. Then straighten your arms to the side and inhale. Then, bend your arms and return to the original position and exhale. Do this exercise with several additional springs.
6. Now you should take the expander in your hands and move it behind your back so that the right arm is bent at the shoulder and the left arm is pressed straight to the thigh. Then extend your right arm upward until straight and inhale. Returning to the original position, you need to exhale. Repeat this exercise with both hands.
7. In this exercise, you should take the expander with your palms facing inward. Raise your left hand to the side, and press your right hand, bent, to your chest. Then you don’t need to bend your left arm, straighten your right arm to the side to maximum straightening and inhale. In the next step, bend your right arm and return to the original position and exhale. The exercise should be done with each hand.
How to practice wrist expanders for those who already feel that they have exhausted the possibilities of such unassuming exercises? Here we recommend using several options:
- if using a rubber expander, try to squeeze the ring not with your entire palm, but with several fingers;
- good results are obtained by an improved exercise when the expander is held in a compressed state during the rest cycle.
If training with a wrist expander seems too monotonous to you, it’s time to move on to targeted training using specific schemes. The most general training program with a wrist expander should be carried out in compliance with the following recommendations:
- the workout should be preceded by a warm-up using a small hardness expander;
- each exercise must be performed 10-15 times;
- intense training (over several hours) requires three to four days to fully restore muscle tone.
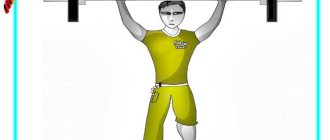
Shoulder exercises
Overhead press
Stand in the middle of an elastic band with your feet shoulder-width apart. Take the handles of the resistance band and raise your arms to shoulder height with your palms facing you so that your fingers touch your shoulders. Pull your arms up, with your palms slightly outstretched, until your arms are completely straight. Return to the starting position and repeat the exercise 8-10 times.
Arm stretching
To train your upper shoulders, stand in the middle of an elastic band with your feet shoulder-width apart and grab the handles of the band with your palms facing you. Without bending your elbows, move your arms straight out in front of you to shoulder height. Slowly return to the starting position and repeat the exercise 8-12 times on each arm.
Standing raises
Place your feet in the middle of the elastic expander and take the handles of the expander from below with your palms facing you. Bend your elbows slightly and spread your arms out to the sides at shoulder height. Slowly return to the starting position and repeat the exercise 8-10 times.
Bringing hands together
Stand straight with your feet placed in the middle of an elastic band, feet shoulder-width apart. Take the handles of the expander with your palms facing you and lower your hands to the level of your hips. Pull the resistance band to shoulder level while keeping your elbows locked in a “V” shape. Slowly return to the starting position and repeat the exercise 10-12 times.
Breeding
Sit at the end of the ab bench and place your feet in the middle of the resistance band. Take the handles of the expander with your palms facing you and cross the expander on your knees. Lean forward, keep your back straight and move your arms to the sides until the expander reaches shoulder height. Return to the starting position and repeat the exercise 10-12 times.
How to choose the working resistance of an expander[edit | edit code]
The correct choice of working resistance is the key to training effectiveness. Just like training with free weights, different resistance band exercises require different levels of resistance.
Selecting the working resistance is the main goal of the first workout.
Exercises with expanders have their own characteristic feature - the load on the muscles increases as the elastic elements stretch. Therefore, to get the maximum effect from the exercises, it is important to correctly adjust the initial tension of the elastic tubes. Light tension on the tubes without sagging is considered correct.
Also, do not increase the resistance by strongly stretching the tubes in the original position!!! Instead, change the tube to one with higher resistance.
Is it possible to lose weight with an expander?[edit | edit code]
The expander is an excellent exercise machine for getting rid of extra pounds, since it is moderate loads that allow you to speed up the metabolic process, and this is what helps burn fat. The best option for losing weight is a rubber expander, which can strengthen the necessary muscles in a short time. It is only important to choose the right load level in order to work out those parts that even dumbbells and weight machines cannot handle.
There is a certain set of exercises with an expander that is perfect for those who want to acquire a beautiful and slender figure. After a five-minute warm-up, you need to perform the following series of actions approximately 10 times in one approach:
- step on the center of the expander to fix it on the floor, place the edges on your shoulders and start doing squats;
- raise your arms up and stretch the expander with all your strength;
- maintaining the starting position, raise your arms straight in front of you;
- bend your arms and place them behind your head, then use your forearms to stretch the expander on your raised arms;
- Having assumed a lying position, grab your feet with an expander, holding its ends with your hands. Then lift your legs off the floor and raise your upper body.
Arm exercises
Concentrated biceps curls
Squat down with your right leg straight. Place an elastic band under your right foot. Grab the top of the resistance band with your elbow resting loosely on your knee. With your palm located on the other side of your knee, pull the expander towards your shoulder, and when you reach your shoulder, try to tighten your biceps as much as possible. Slowly return to the starting position and repeat the exercise 8-10 times on each side.
Standing bicep curls
Stand in the middle of an elastic band with your feet shoulder-width apart. Take the handles of the expander, while in the initial position your arms will be lowered. With your palms facing outward, raise your arms up with your elbows bent until you begin to feel tension in your biceps. Slowly return to the starting position and repeat the exercise 12-15 times.
Triceps extension (Kick Back)
Sit on the ground with your right leg extended forward. Place an elastic band under your right foot. Take the handles and place your hands along your body, with your palms facing back. Bend your elbows, keeping your forearms parallel to the ground. Then move your arm back until it is completely straight. Return to the starting position and repeat the exercise 8-10 times.
Triceps row
Sit on a bench or chair and place an elastic band under your butt. Take the handles and raise your arms above your head, bending your elbows so that they are behind your neck. With your palms facing up, raise your arms completely. Return to the starting position and repeat the exercise 10-12 times.
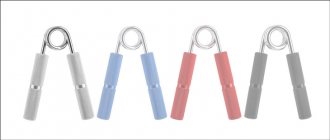
Carpal expander - benefits and harm for hands
Rubber. The simplest type is a regular rubber ring of sufficient density with a hardness of 5-25 kg. It is the simplest, most affordable and durable type of exercise machine.
During training, you just need to squeeze it in your hand. It doesn’t make unnecessary sounds, it’s very cheap and you can buy it in almost every sports store. Due to the strength of the material, the risk of tearing is minimal, and the benefits of training are not inferior to other types. It will last a long time and reliably. The disadvantage is the inability to regulate the load: rubber expanders for the hands are not able to provide serious tension.
Spring-loaded. It looks like two grooved handles held together by a spring. They are made of metal or plastic. Quite common in a wide price range. The great advantage of this type is the ability to regulate the pressure force. This allows anyone to practice different types of exercises by purchasing only one exercise machine.
Significant disadvantage: fragility. The structure weakens over time or fails altogether. Cheap spring ones can last a month of hard training, but they also won’t provide sufficient counteracting force. For serious activities, it is better to buy an expensive, but branded one.
Adjustable. The most functional type of manual expander with different load levels. Allows you to gradually increase the load to avoid injury. It is similar to its spring “brother”, but has a larger set of functions. Accordingly, in price and reliability it is ahead of other types.
More and more new types of this simulator are appearing on the modern market. Manufacturers offer devices in the form of balls and other devices, but these three are time-tested. The products of the company Captains of Crush have proven to be the highest quality, whose products are used by all athletes in the world, and the quality is beyond doubt. All-metal ones have the greatest rigidity (from 25 to 165 kg).
You need to choose and try only with a rested hand. This is necessary in order to fully feel what muscles the simulator develops. Squeeze all the suggested exercise machines until one of them seems the most comfortable. The hand expander should under no circumstances cause pain.
For the first attempts, rigidity should not bother you either. Stronger tension is necessary for those who exercise for a long time. Therefore, at first a relatively cheap rubber or spring trainer will suffice. In the future, it may turn out that its shape causes convulsions and will have to be changed. So at least you won’t be sorry for the money.
Each quality product has a designated hardness value. Usually it is applied directly to the simulator and indicated in kilograms. Without it, the expander is most likely of poor quality and weak. Shoulder expanders have also proven effective.
The first priority is to develop the right strategy and technique. Anyone can squeeze; it’s important to learn how to do it correctly, and most importantly, with the right intensity and breaks. Such classes involve two techniques:
- The maximum number of compressions is 1-2 minutes of rest.
- The maximum number of compressions is 1-2 minutes of rest while holding it in your hand.
Both methods entail the same result: fatigue in the forearms and further increased stress. It is believed that the second method is more effective, because the hands are under tension longer. If you don't have a fairly rigid structure, you can use a rubber one, but only squeeze it with a few fingers (and not with your whole palm, as in the traditional technique).
Any action with this simulator must obey a number of important rules:
- Repeat the exercise 5-15 times.
- Perform a representative warm-up with a weaker device.
- The interval between classes is 3-5 days.
For greater effectiveness, you should choose an optimally rigid device and give the muscles enough time to recover.
Any exercise can bring results: hard is the most preferable, but with a light simulator it is enough to do more approaches to level out the effect. The most common exercise techniques are:
- Persistent compression for 1-1.5 minutes, trying to do the exercise 100 times. Rest: 3-5 minutes. Approaches: 3-7 times.
- Compression 100 times, keep the exercise machine in a compressed state during rest. Rest: 3-5 minutes.
- Squeeze the exercise machine an arbitrary number of times until a burning sensation is felt in the muscles of the forearm.
- Squeeze a very hard device 10-12 times.
- Hold until it stops 1 time, then squeeze until it stops.
The intensity of training is individual for each person. The average number of approaches for each exercise with an expander is 15. It can also be used in combination with other types of exercises, depending on what muscles the person is working on. For example, the benefits and harms of Nordic walking are a very relevant issue for modern sports. In any application, a wrist expander will benefit your health for many years.
It is very difficult for a beginner who has just stepped into the gym to choose a wrist expander for himself. After all, there are a lot of them in sporting goods stores. Different types and colors. But you want to buy more than just a toy. And a useful thing. Which determines whether you will succeed in bodybuilding or not. Let's try to figure out how to choose a wrist expander.
First of all, let's figure out why such a mini-simulator is needed in principle? But why: if you remember that, by and large, all types of sports associated with lifting weights are called “weightlifting.” You see, it's heavy. This means that you will have to lift equipment that weighs a lot in the gym.
Now imagine that you didn’t hold anything heavier than a pen in your palm. And the muscles of the forearm, with the help of which the fingers are compressed and unclenched, do not have sufficient strength to hold a heavy projectile. In the best case, you simply won’t lift it. Your palms will unclench under the weight of the barbell.
They want to quickly become voluminous and prominent, without particularly straining and certainly without thinking about what is actually needed for this. They are concerned with the questions: where would it be more profitable to get methane and how to buy tamoxifen cheaper, and not how to develop a steel grip, the strength of which directly determines the likelihood of your possible injury.
From here we draw the correct conclusion - the muscles of the forearm and hand also need to be pumped. This is precisely why they use the good old hand trainer, familiar to everyone from childhood.
The most common model of hand expanders is a regular rubber ring. They are made in different hardnesses. From soft to very hard. Such products have only one drawback - you cannot change the rigidity. That is, it is set at the factory, and that’s it.
The maximum load that such products can provide is 70 kg.
Spring models are very popular among athletes. Here the load is already large - up to 170 kg. All professional bodybuilders try to choose just such serious devices from the variety of available equipment.
There are also hydroscopic specimens that represent a sphere. There is a rotor inside the sphere. When you press the sphere, the rotor begins to rotate and exerts resistance. You should know that most athletes consider this design unsuccessful and do not use them.
For beginner bodybuilders and beginners in other strength sports, this equipment is indispensable. It is also necessary to buy a pocket mini exercise machine for those for whom increasing finger strength is a fundamentally important task. This also applies to musicians (for example, guitarists).
First of all, those whose profession or hobby is directly related to hand strength: athletes, climbers, bodybuilders, arm wrestlers, musicians, etc. For example, many guitarists specifically purchase this device to increase finger strength at home. For students, schoolchildren, office workers, housewives and the elderly, exercising with this apparatus will also not be superfluous. The benefits of a hand expander are as follows:
- strengthening grip;
- training of the hand and forearm muscles;
- strengthening fingers, wrists, tendons, ligaments, cardiovascular system;
- prevention of arthrosis, arthritis and other diseases;
- improved blood circulation;
- development of fine motor skills (“device” with minimal rigidity);
- prevention of neuroses, stress;
- restoration of muscle activity after injury;
- development/restoration of joint mobility;
- correction of muscle relief, fat deposits.
In most cases, when it comes to what muscles are worked during exercise with an expander, only the hands and forearm are mentioned. However, there is an opinion that regular exercise also trains the large muscles of the back and chest. The truth is that this is hard to believe.
The advantages of the projectile include:
- compactness;
- versatility;
- safety;
- no age restrictions for use;
- ease of use;
- the ability to exercise anywhere;
- affordable price, which is many times lower than that of simulators with an analog effect;
- You can choose a set of classes yourself (you don’t need a personal trainer or regular visits to the gym).
It is better to choose a projectile with minimal rigidity to avoid bloating of the veins. Overexertion of the hands can also cause exacerbation of arthritis, arthrosis, inflammatory processes and pain. More detailed information on how to exercise correctly will be discussed at the end of the article with step-by-step training examples.
Ab exercises
Kneeling Crunch
Attach the resistance band to a high support (such as the top of a door), grab both ends of the resistance band and squat down. Elbows should be bent and positioned near the body. Tighten your abdominal muscles and lower yourself down. Repeat this movement 10-12 times.
Woodchoppers
Attach an elastic band to a high support (for example, the top of a door or an exercise machine). Stand with your right side facing the support and take the free end of the elastic expander with your hand, which you then place near your head. In a smooth motion, move the resistance band down in front of your body to your knee, pushing out your sides and your back leg. Repeat the exercise 8-10 times.
Squat steps with an elastic band (Anti-Rotation Band Walkouts)
Secure an elastic band around a support (post or machine) slightly above your chest. Grab the other end of the resistance band, reach the resistance, and squat down. Hold the resistance band with both hands directly in front of your chest, tighten your abs and take a step to the side until you feel that the resistance band is sufficiently stretched. Return to the starting position and repeat the exercise 6-8 times on each side.
Reverse crunches
Secure a resistance band low around a support (post or machine). Lie on your back, bend your knees at an angle of 90 degrees. Wrap the other end of the resistance band around the top of your legs, just under your toes, and move so that tension is applied to the band. Keep your back straight and tighten your abs. Move your knees towards your shoulders, while you will train your abdominal muscles. Repeat the exercise 12-15 times.
Russian twist
Sit on the ground with your legs spread, with the middle of the resistance band placed on the bottom of your feet. Hold both ends of the resistance band in your hands. Bend your knees slightly, keep your feet flat on the ground, and bend to a 45-degree angle. With your left hand, pull the expander across your body to the right side and reach with your right hand to your right side. Tighten your side abdominal muscles while keeping your middle and lower back in a neutral position. Return to the starting position and repeat the exercise 10-12 times on each side.
We are confident that with these exercises we have helped you create a unique training plan that you can use anywhere. What exercises do you do with an elastic expander? Write your answer in the comments, if you liked this article, support it by sharing it .
Benefits of use
The simulator has only one drawback - it is inconvenient to train your legs with it.
Now about the pleasant things, about the advantages. The main advantage of expanders is that you can train with them at home. And thanks to its compact design, you can take it with you anywhere, be it a business trip or a vacation.
A standard shoulder expander consists of two handles connected by five springs.
The springs are removable, thereby allowing us to adjust the load. This is a definite plus. The springs can be extended by attaching a set of five more springs to them, which will expand the capabilities of the simulator.
Spring hand expanders are the best option for grip training, leaving rubber competitors far behind. Some models of such simulators are universal, for example, Hammar Vice Gripper. The load is adjusted by replacing the springs.
Having familiarized yourself with all types of spring expanders, you can proceed directly to training.
Using such a simulator has several advantages:
- Training allows you to work those muscles that are usually not involved in the process of usual training. And if you purchase several of these simulators at once, you can work out all the groups.
- This simulator is easy to use, so you can exercise with it at home or anywhere else. The exercises are simple, but very effective.
- This simulator is suitable for both men and women and even children. You just need to choose the right model.
- The expander is very light, so you can take it with you on a trip or on a business trip to keep fit anywhere and at any time.
- Using an expander, you can increase the load during your usual exercises, complicate them and make them more effective.
- The exercise machine will help you get a beautiful and sexy body.
Exercises to pump up your triceps at home
Exercise for pumping up triceps No. 1. Pushups
The simplest exercise you can do right now. There is one caveat: the narrower the position of the hands, the more the triceps are involved in the work. The wider, the more the pectoral muscles and deltoids work. Our option is to alternate between a medium hand position and a narrow position.
Exercise for pumping up triceps No. 2. Dips
Push-ups on uneven bars at home can be:
- An addition to standard push-ups;
- The basis of triceps training. In this version we use weights. Not immediately, but after passing a certain level of experience.
Dips with an emphasis on the triceps have a nuance: when performing the movement, you should not lean forward; we press our elbows to the body. Otherwise, the pectoral muscles will work, not the triceps. The effectiveness of dips on parallel bars is significantly increased by a weight belt and plates as a weighting agent. You can use regular weights, but the effect is worse. Anyone who wants to build triceps quickly should have a weight belt.
Exercise for pumping up triceps No. 3. Bench press
We squeeze dumbbells or a barbell. The best option is to have an adjustable bench with the ability to use an angle of 45 degrees. The 45-degree bench press is an effective exercise, but rarely used at home due to the lack of equipment.
Exercise for triceps at home No. 4. Extension of arms with a projectile from behind the head
Dumbbells, an expander or a rubber loop act as a projectile. The best isolation exercise for the triceps, without which muscle pumping is greatly slowed down
Exercise for triceps at home No. 5. Retraction of arms with the projectile back
Another isolation exercise that can be performed with similar equipment. Used as a complement to or replacement for overhead arm extensions.
Exercise for triceps at home No. 6. Press with apparatus up
Analogous to the standing barbell press. Performed with dumbbells, expander or loops. It pumps up not only the triceps, but also the middle and anterior deltoids, which improves the appearance of the shoulder girdle.
Butterfly exercise[edit | edit code]
“Butterfly”
The “butterfly” simulator is the simplest and most accessible, especially for home use. It trains almost all muscle groups, namely the back, hips, shoulders and arms. Exercises with the “butterfly” are performed standing, sitting and lying down, depending on what results you want to achieve.
- on a chair (for the inner thigh muscles). Sit straight on the pedestal, holding the expander between your knees so that its head hangs below. Place both palms on his arms and squeeze with your thighs. Repeat 50 times in several approaches.
- standing (for shoulders and chest). Lift the expander up and begin squeezing it using the shoulder muscles.
- lying down (for the abs). Lie on the floor, bend your knees, placing the “butterfly” between them so that one handle is in the middle and the other is directly in front of your face. Then, lifting your legs off the floor, begin to squeeze the expander, tensing your abdominal muscles.