>Operation >Do-it-yourself treadmill at home
The treadmill is a popular exercise machine for developing endurance, strengthening the heart and blood vessels, toning muscles and losing weight. How realistic is it to make it yourself at home?
In reality, the functionality of a homemade treadmill will be significantly inferior to ready-made models in sports stores - the user will not be able to use the built-in training modes and other options. These shortcomings are compensated by the low cost - some craftsmen manage to assemble a working simulator from scrap materials in the barn.
How to make a treadmill with your own hands
In each of our articles we talk about the benefits of running, treadmills, and the reasons why you should sign up for a fitness center membership. But! The country is large, and there may not be a specialized gym nearby, as well as a stadium, a park, or just smooth streets. And if there is, then the weather is most often in no hurry to please with acceptable degrees and lack of precipitation during the planned training. It's time to think about how to make a treadmill with your own hands, is it possible without special skills, equipment, and... is it necessary? Let's go in order.
Buy a track or make it yourself
When you want to buy a treadmill for personal use, you come with the understanding that a good model is quite expensive. Buying an inexpensive one, repairing it, and then replacing it anyway ends up being even more expensive. On the other hand, a full-fledged replacement for a factory simulator will also require a decent investment. Not as big as when buying ready-made in a store, but still. At the same time, you will also have to do the repair of a treadmill made at home yourself. Therefore, you should consider all the pros and cons.
pros
- Lower cost, especially if you have the materials at home or can get them “cheaply”.
- With correct calculations and implementation, the effectiveness of the classes is comparable.
- A feeling of pride and self-sufficiency not only when using it, but simply when looking at your creation.
- Originality plus the ability to optimize the design, shape and size to suit specific needs.
Minuses
- Labor-intensive and time-consuming to manufacture, especially if in a hurry important points are missed and you have to redo it.
- Difficulty finding specific materials.
- Inability to contact a service center for repairs or professional advice.
- Limited functionality.
If you still decide to do it, then further information will help you.
DIY Treadmill Ideas
Just ideas, because the main advantage of a homemade treadmill is that it is built to suit individual needs. The final look and implementation will depend on the master, and you can choose the sizes and materials yourself.
“Abacus” track
This is a primitive, but at the same time effective option.
Almost anyone can make it, literally from scrap materials. Something similar was used in the design of the very first treadmills, exercise bikes, and automobile testers of the early twentieth century. Remember what the accounting accounts of the Soviet period looked like - a rectangular frame with transverse knitting needles between two long sides, and round knuckles strung on them. Same principle here:
- We knock down a rectangular frame from wooden blocks or weld a rectangular frame from a metal profile, the length of which will be sufficient for a normal running step.
- We prepare a sufficient number of rollers to form a “web” (you can take identical sections of steel or metal-plastic pipes, or old bearings).
- Inside the rectangle or on top we attach cross-bars with a circular cross-section in such a way that the rollers placed on them are as close to each other as possible, but without touching.
The smaller the diameter of the rollers and the closer the rows, the more comfortable it will be to run. It is highly desirable that the sideways displacement of the rollers be minimal!
- We add small legs to the frame, and the front pair should be slightly higher (alternatively, the side guides can be made curved, then the vector of movement of the legs will be directed along a downward parabola).
- Be sure to install handrails in front or on the sides.
A special feature of this type of treadmill will be a reduced load on the joints and ligaments of the legs and an additional load on the upper shoulder girdle - in order to walk or run normally, you will definitely have to lean on the handrails.
Mechanical track with canvas
This is also a roller track that “works” due to friction and gravity, but with a belt, like on classic exercise machines. It is safer, and the movement is uniform. Once you get used to it, you can run without leaning on your hands. Here it is possible to use rollers of larger diameter, the main thing is not to forget to tighten all the rollers with rubber or special cloth, like the caterpillar of a tractor (tank). People with experience advise when arranging such a simulator to use the outer rollers of a larger diameter than the rest.
Interesting! A similar treadmill is used by a female inventor from Russia. Moreover, he uses it not only for running, but also for charging home gadgets by connecting an analogue of a dynamo to the front roller, which generates electricity during training.
Path like from a store
The two previous options have the same drawback - it is difficult to control the speed on them, while the electric treadmill is designed to set the desired pace. The design principle is similar, but the essence is different:
- The front and rear rollers have a much larger diameter.
- The rear one is connected to a chain, belt, cardan or gear drive driven by an electric motor (you can use an internal combustion engine, but definitely not in an apartment or private house, which negates all the advantages of a home exercise machine).
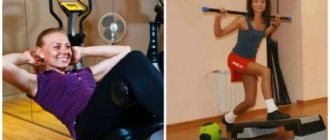
We make sports equipment with our own hands for fitness classes
In this case, we do not need to first make a drawing of the simulator with our own hands. All of these devices are quite simple, and you don’t need any special skills to assemble them.
In order to assemble sports equipment with your own hands for fitness, you need very little. The step platform is made from a sheet of chipboard, which is cut into three parts:
1. Upper platform: 50x100 cm;
2. Support posts: 50x30 cm.
Using self-tapping screws, we attach the support posts to the upper platform. For covering, you can take a regular rubber bathroom mat, which is sold in rolls. Using glue, we attach it to the surface and get a non-slip and stable surface on the platform.
The wheel for swinging the press is also very popular. Making it couldn’t be easier, all you need is a wheel from an old stroller or a children’s tricycle, a round metal profile (with threads on the ends), two, a piece of rubber hose or electrical tape. We cut the profile into two halves, insert the ends into the hole of the wheel, and secure the handles tightly with nuts. We stretch the rubber hose over the ends of the profile or wrap them with electrical tape.
DIY treadmill at home
The treadmill is a popular exercise machine for developing endurance, strengthening the heart and blood vessels, toning muscles and losing weight. How realistic is it to make it yourself at home?
In reality, the functionality of a homemade treadmill will be significantly inferior to ready-made models in sports stores - the user will not be able to use the built-in training modes and other options. These shortcomings are compensated by the low cost - some craftsmen manage to assemble a working simulator from scrap materials in the barn.
What properties should a high-quality exercise mat have?
When choosing the right mat for a treadmill, you should understand what tasks this element must cope with. This will allow you to discard incorrect options and focus your choice on better models.
First of all, such mats must provide effective damping of vibrations from a working exercise machine. This feature will have a positive impact not only on the silence and comfort when using sports equipment, but also on the durability of the equipment, since the reduced level of vibration impact will reduce the mechanical wear of parts and mechanisms.
In addition, an important feature of such models is the high density of the material. This is necessary so that the mat does not press under constant load from a heavy sports equipment. Otherwise, it will not cope with its initial tasks. In addition, low-density mats will not protect the floor from damage while the machine is in use. This is also of great importance.
Another important feature that should be given special attention during use is the anti-slip effect. This will ensure that the simulator remains stationary during operation, which has a positive effect on the safety of its use.
Design
The do-it-yourself treadmill diagram includes the same elements as ready-made models:
- The frame is the basis of the treadmill, combining all the elements into a single structure. For its manufacture, durable metal is used, adapted to constant high loads. Many modern manufacturers produce aluminum frames - lightweight, durable, practical, with good shock absorption.
- Racks are additional support for the user during training. Their length and height can be different - the main thing is that the structure is stable and easy to use.
- The running surface should not be slippery so that a person does not get injured while jogging. The optimal dimensions are 1.25 x 0.4 m. Thickness is 1.8-2 cm.
- Treadmill deck – support for the running belt. You can make it yourself from sheet material of increased strength. The thickness is at least 2.5 cm, because the deck takes on the main load.
- Shock absorbers - in finished models they are made of special material and built into the structure. At home, shock absorbers can be cut from elastic rubber and installed under the deck.
- An electric motor expands the functionality of a homemade treadmill and makes exercising on it more comfortable. After all, the canvas is driven by a motor, and not by human muscular power. For moderate-intensity runs, a 2 hp engine power is enough.
- Training computer - all factory models have this and consists of an information display and several function buttons. It is impossible to make and connect a computer with your own hands, so it is not available in self-constructed versions.
- Touch sensors for measuring heart rate - these are usually built into the handrails and connected to the training computer. Home models lack these elements for the same reason as training computers.
Assembly
Before you make a treadmill with your own hands, you need to decide on the appearance, size, and prepare the material in the required quantity.
The assembly sequence of the mechanical track is as follows:
- Making a frame that serves as a support for the entire structure.
- Production of the deck on which the running belt rests.
- Connection of the frame and deck with shafts located horizontally at different heights.
- Tension of the running belt according to the principle of tank or bulldozer tracks.
- Functionality check.
Possible problems
Such an ambiguous decision as assembling a simulator with your own hands at home is a rather controversial option. First of all, you need to know where you can buy metal with suitable parameters. If you cannot order a set of pipes specifically for your parameters, then you will also have to deal with the problem of accurate and careful cutting yourself.
But it doesn’t matter where and in what form you purchase the materials. In any case , you will have to fasten these pipes together yourself. Most likely, and what will be the most convenient solution, you will choose soldering. After the structure is assembled, you will have to install bearings and shafts there, and it is important to do this in such a way that the deck is installed level.
Problems that can arise with the canvas are its price and availability. After all, only a solution designed specifically for these tasks is suitable for this, and therefore it will be quite difficult to find such sheets on the open market. And one more thing: the assembly process itself implies the presence of free time and interest in the process.
Malfunctions
First you need to find out the cause of the problem, and then move on to fixing it. Common malfunctions include:
- Insufficient gliding of the running belt - this occurs due to irregular or insufficient lubrication. It is recommended to lubricate the machine every 30 hours of operation - a special silicone lubricant is used for this.
- Debris getting under the canvas. To avoid this, the space underneath should be periodically cleaned of dust and dirt, especially if the equipment is installed outdoors.
- With frequent use, the tape changes position - this also happens in factory models. Breakage is eliminated by adjusting the web tension.
If the equipment is equipped with a motor and does not turn on, the reason lies in the electrics. First you need to turn off the power, then dismantle the electric motor, inspect it, disassemble it to determine the fault. In the video at the link we are talking about repairing electric motors on treadmills with your own hands:
Sometimes the cause of defects is premature wear and failure of a separate element. In this case, it is enough to replace it, test the repaired simulator and use it again for its intended purpose.
Source
Device Basics
The initial element, without which any such sports attribute cannot do, is the fastening and holding frame. This, in essence, is the fastener, frame and skeleton of the entire mechanism, and everything else cannot do without this component. It is important that it can withstand a lot of weight, which is why it is better to use durable metals.
If you need a monitor that will also serve as a performance indicator, then you will definitely need a stand that can hold it all. It goes without saying that you also need a canvas, that is, in fact, a path along which you can run.
Let's not forget about the convenience elements. At first glance, it may seem that you can do without a good shock absorber. However, not everything is so simple, because the knees are a very vulnerable place in terms of running, and sometimes they, unable to withstand heavy loads, begin to hurt. It is in order to avoid this unpleasant symptom that it is recommended to jog not on asphalt and closer to a country road.
The best option is a forest path. It provides excellent shock absorption. And our treadmill should be as minimally hazardous to the user as an ideal grassy path.