A strong and healthy neck is important for any person, whether you are a professional martial artist or an office worker. There are quite a large number of exercises that you can do to develop your neck muscles. The Bortsovsky bridge especially stands out among them. If you begin to perform this exercise regularly, you will gain the necessary protection from injuries during martial arts training, as well as fitness activities and everyday life. From this article you will learn all the necessary information about the “wrestling bridge” exercise.
Neck muscles
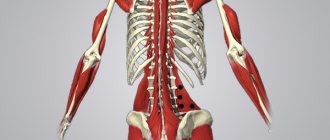
There are quite a lot of muscles in the neck. They can be divided into three large groups - deep, middle and superficial. They are involved in turning and tilting the head, and also keep it in a straight position. In addition, they are involved in the processes of swallowing, breathing and sound production. For example, the scalene muscle is involved in raising the ribs during inspiration, and the digastric muscle is involved in chewing food and swallowing.
The Importance of Neck Strength
Most people are put off by exercising this part of the body because they think they might hurt themselves. But this is precisely the reason why you need to train your neck muscles. To support the cervical spine and skull, these muscles must be strong enough.
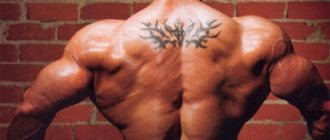
There is no doubt that professional athletes (football players or wrestlers) need absolute neck strength. Compared to other athletes, it is wrestlers who have the strongest and most powerfully developed necks. This allows you to protect yourself from damage and choking techniques, and also helps with a missed blow to the head, absorbing and absorbing the blow.
The wrestling bridge is a key exercise for developing neck muscles. However, this exercise is beneficial for the entire body. The work includes the spine and all the muscles of the back of the body. Even the abs, legs and hips are involved. Therefore, it is reasonable to perform the wrestling bridge for absolutely everyone, including women and children.
About contraindications
Before you start training your neck muscles, it is recommended to learn about contraindications. Not all strength exercises are allowed for everyone without exception. If you have diseases of the cervical spine, exercises to pump up muscles are strictly prohibited. If there are no direct contraindications, but during training the athlete experiences headaches, tension in the temples or back of the head, it is recommended to abandon sports activities. Do not overexert yourself if you have back pain or other unpleasant sensations.
Remember that to conduct effective classes, excellent health is important.
If discomfort occurs and general condition worsens, classes are stopped. In such cases, it is recommended to consult a doctor to restore sports activities.
Exercise technique
So, let’s move on to considering the technique of performing the “wrestling bridge” exercise. The exercise is a bit like a gymnastic bridge, where you need to lift your torso off the floor, supporting your body with your feet and hands. The wrestling bridge is a more complex exercise that involves almost the entire body.
It is recommended to perform this exercise on a soft surface. A rolled up towel or any other pillow can be used to place under your head. It is also very important to perform all movements slowly and smoothly. If you move too quickly, you are likely to get injured, just like with any other exercise.
- Step 1: Start by lying on your back with your knees bent. The feet are planted firmly on the floor near the buttocks. The narrower your legs are, the more difficult it will be to perform the exercise, and, accordingly, the wider they are, the easier.
- Step 2: Place your hands behind your head and tighten your hamstrings, glutes, and back of your neck. Then lift your hips as high as you can. Try to touch the mat with your nose and achieve a good arch in your back. Keep your heels close to your head for maximum arching.
- Step 3. At this stage, you can perform the exercises statically or dynamically. For the static variation, simply hold the position through your maximum range of motion, rocking slightly back and forth a couple of centimeters. For the dynamic variation, move forward and backward with a large range.
Perform exercises from two to five sets once or twice a week for high-quality work on the muscles of the cervical spine. Also, do not forget that after training you need to stretch your neck muscles so as not to get compression or blockage between the vertebrae in the cervical spine.
Pumping up the neck muscles (S. McRobert)
Rate this post
Strengthening the trapezius muscles is the best way to build a powerful base for specialized neck exercises. This is why I include barbell cleans in the program of all beginning athletes. This dynamic exercise works all the muscles in the upper back proportionately and is especially effective for strengthening the trapezius. Because the traps are rarely used in everyday life, they are a weak point for almost everyone starting weight training. The upper section of the amplitude is especially difficult for beginners. However, there is good news: the trapezius quickly responds to training and after a short period of time becomes stronger than any other back muscle.
Of course, you can start doing specialized exercises to build up your neck before your traps get stronger, but I find it's best to wait until a strong upper back strength base is built. Strength training in various sports usually begins in the off-season, so there is no need to rush into neck exercises. With this in mind, I force my athletes to improve their technique on cleans, increase the working weights, and then increase the load by introducing barbell rows and shrugs into the program. After this, they are ready for direct work on the neck.
If you are quite old, then you most likely do not perform barbell cleans due to decreased flexibility of the shoulder joints or other physical limitations. Therefore, you can try doing snatches or rows of the barbell to your chin. In the latter case, start with light weights - technique is very important in this exercise!
All of these dynamic pulling exercises help strengthen the trapezius and the entire back. However, trapezoids are not everything. You need to take care of the muscles in the front and sides of the neck.
It's just a matter of logic - any program should include exercises for all four parts of the neck, but move forward gradually. You can build a solid strength base in the back of your neck, but all those pulling exercises don't do much for the front and sides. If you start too quickly, you can injure them.
The neck muscles respond so quickly to training, probably because they did not receive direct load before. I realized this when I started wrestling. After my first acquaintance with the wrestling bridge, my neck hurt for two days. However, within a week I was able to perform three times as many exercises, without any muscle soreness.
Since I mentioned the wrestling bridge, I'll say that you don't need to do it unless you're a competitive wrestler and haven't done any serious neck training lately. Sports medicine specialists and doctors have been warning about the dangers of this exercise for a long time, as it puts the cervical vertebrae in a vulnerable position. The point is that they are not designed to bend back under extreme pressure.
Fortunately, the neck, like the calves, can be worked frequently. Wrestlers load it at every training session, and sometimes 2-3 times a day. Several of these short workouts over six days will be more productive than heavy sessions twice a week. This is especially effective when you first start training to pump up your neck.
If your gym has a neck machine, give it a try. I have worked on such simulators, including the Nautilus, but it was difficult to find one that suited me. Many of them are poorly designed and only fit people with certain body types. However, there is nothing stopping you from trying.
One way to solve the problem is dynamic stress. I recommend this technique to anyone starting to pump up their neck. People my age will immediately remember the man who invented it - Charles Atlas. In those days, I, like any teenager in America, also bought his courses and studied according to them. However, the second purpose of these courses was to sell a set of weights for more advanced training. Lacking funds, I continued using dynamic tension and achieved results. Some exercises caused muscle soreness, some did not, however, my neck became much stronger, which helped me later in football.
Dynamic tension is suitable for anyone starting to train their neck at any age. You are simply resisting the muscle as it contracts. The resistance can be adjusted and you can stop the set if you feel tired. The risk of injury is minimal.
You can pump all four parts of the neck while sitting. Start with the muscles that pull your chin down towards your chest. While sitting upright, place your palms on your forehead and apply pressure while lowering your chin. Provide enough resistance, but not so much that you cannot lower your chin to your chest. Relax and lift your head, then repeat again. Each repetition should take 5 seconds. In the beginning, perform only one set for each part of the neck of 12 repetitions.
When tilting your head to the side, try to touch your shoulder with your ear. Some people prefer to place their palms on their temples and turn their head in different directions, but I prefer to do this exercise separately for each side. Finally, work the back of your neck. Start with your head tilted back - use your hands to pull it forward, resisting the movement. This will be the strongest of the four positions. The next day, determine by your feelings whether enough work has been done, and move on.
In another workout, you can do less work or increase the number of repetitions. Once you reach 10 reps, add a set and start again with 12 reps. So you can study anywhere - in the office, at home or in a traffic jam. You can train every day, but with the exception of those days when you have already worked your trapezius well. In this case, the back of the neck can be left alone.
An advanced dynamic tension program will require some assistance. This is usually not a problem, even if you are training at home. Your child will help provide resistance while exercising all parts of the neck. Instead of sitting, you can lie on a bench so that your head extends beyond the edge and can move freely.
Your training partner may place a towel over your head to add resistance to the movement. At the end of each set, he locks your head into an isometric contraction position for 6-8 seconds. Some of my athletes had traps so strong that I couldn't tilt their head when they strained their neck.
Alternatively, you can wrap an additional weight in a towel and use it to create resistance. You can use additional ankle weights by placing them on your head. Don't forget about the equipment that John Grimek and many others have used to build an impressive neck - a special head cap to which you can additionally attach weights. It is still effective, but can be difficult to find. I once trained with a very inventive man, Bill Barnholtz, who would put a football helmet on his head, put a bar on himself, and swing his neck in relative comfort.
Regardless of your goals, a strong neck will come in handy. In some circumstances, it can even save your life.
The neck is one of the parts of the human body that is constantly in sight. Therefore, having a neck with developed muscles means showing your physical shape all the time, and not in the summer on the beach or in the gym. This is also beneficial from a practical point of view - as protection from possible injuries, and besides, these exercises do not take up a lot of energy, so they can be done at the end of a workout without thinking about the energy reserves of your body.
Adviсe:
Train your neck once or twice a week.
The easiest way to train is to create resistance with your own hands or a towel, you can ask someone for help.
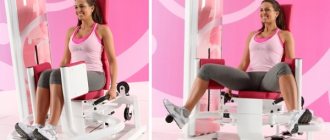
If your gym has a 4-way neck machine, use it - it's a great tool.
A good way is to use a half deflated ball. Clamp it between your head (on the desired side) and the wall, preferably with some kind of recess. And try to push the ball into the wall.
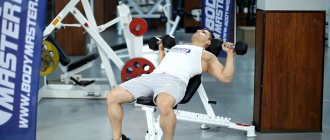
Another way is to do a set while lying on a bench and hanging your head. Place the weights on your forehead (if you're lying on your back) or the back of your head (on your stomach) and raise your head.
The most common mistakes:
Do not do exercises like the wrestling bridge, this can cause damage to the cervical vertebrae.
Don't do less than 10 reps per set.
Do the reps slowly and in a controlled manner, do not use an explosive style.
Training the muscles of the neck and trapezius
A side effect of the development of the trapezius muscles is the so-called “slanted shoulders.” Many bodybuilders use shrugs exclusively to work out the trapezius, and do them with an incomplete range of motion, which leads to overdevelopment of the upper part of the trapezius. Hence the unaesthetic “slope” appearance. To avoid this, there is an excellent exercise that, according to kinesiology, is the opposite of shrugs - raising your head to the side. Only the head moves here, so you completely protect yourself from the effect of “sloping shoulders”. In addition, you develop one of the most important muscles in the neck, the fudinocleidomastoid, which, along with other muscles, supports the cervical spine.
Scheme
Lie on your side with your shoulder toward the edge of the bench, so that your head can move freely up and down in a vertical plane. The weight on the belt should hang from your head down to the floor.
Slowly tilt your head towards your shoulder as low as possible, strictly in a vertical plane. At the bottom point you should feel a full stretch of the working muscles. Then lift your head up along the same path to the highest point. Do not turn your head while moving up. The eyes should look straight ahead.
As you finish lifting, inhale. When you reach the top, exhale, then inhale again and hold your breath while lowering your head. At the lowest point, exhale again.
All movements are absolutely controlled, the body is in a fixed position all the time.
The speed of movement is slow or medium - without accelerations or jerks.
Notes
Working on the neck muscles requires extremely precise technique. The movement must occur strictly in a vertical plane. You cannot turn your head left or right, tilt forward or backward. This can lead to serious injury to the cervical spine.
The sternocleidomastoid muscle not only tilts the head from side to side, but also turns it to the right and left and tilts it back and forth. It is quite natural that she will “strive” to perform all her functions at the same time. This must be avoided. To protect yourself, make sure that the stabilizing muscles of the neck, like the flexor-extensors, are constantly tense and support the head; allowing it to move only in a vertical plane.
Since complete control is vital here, do not work with super heavy weights. Excessive weight will cause you to speed up, jerk, or use muscle functions that are unnecessary and even harmful. Don't forget that super-heavy weights will definitely recruit other muscles to stabilize the body, improve movement control, and assist with lifting. In itself this is not so bad. But the negative effect still outweighs. Extra-heavy weights will force you to work with less than full amplitude. In this case, the contraction of the upper trapezius, sternocleidomastoid and other cervical muscles will also be incomplete.
Because this exercise requires extremely precise technique, always inhale at the beginning of the lift and hold your breath throughout. Holding your breath stabilizes the torso and allows the head to move only in the vertical plane. If you exhale as you rise, your chest will relax and you may involuntarily swing your head forward or backward. Therefore, it is necessary to hold your breath, especially when working on the neck muscles.
At the top point, after exhaling, do not let the muscles relax completely, otherwise you may lose control of the movement. Maintain constant tension in them to ensure that the head moves in a strictly vertical plane.
The muscles working in this exercise are located and structured differently. But they are all important for supporting the neck and head, and therefore they need to be comprehensively strengthened. The trapezius plays a critical role in the movement of the cervical spine, although few are aware of its function in working together to flex and extend the neck. If you only work the trapezius and ignore the other neck muscles, the trapezius will begin to “bulge” and the overall appearance will be unsightly.
Lying Neck Curl
Scheme
At first glance, this exercise may seem barbaric. But believe me: there is nothing more effective for the front of the neck. Lie across a horizontal bench so that your neck can move freely, but your shoulders rest with their entire surface on the bench. Fold the towel into a triangle and place it on the bridge of your nose. Then place a pancake (whichever you can handle) on this “mat”. Pressing it against your forehead, tilt your head back to approximately 45 degrees below neutral. Then lift it until your chin touches your chest. After warming up, do two sets of 12 reps.
Shake your neck!
No part of the body demonstrates physical strength as visibly and clearly as a strong, muscular neck. And it’s not surprising, because this muscle group is always in sight. Strong neck muscles play a key role in many sports. For example, in contact. A powerful neck will not allow your opponent to tear off your head and take it with him as a “trophy”. But even if your plans do not include a fight with the world champion in Greco-Roman wrestling, regular training of the neck muscles will not hurt. Moreover, it will not take up much of your time. About 5-10 minutes once or twice a week is enough. Some believe that the neck cannot be worked as a separate muscle group: this supposedly violates the proportionality of the physique, in the sense that it visually makes the shoulders narrower. What nonsense! Is it really better when your head hangs on your neck like a dandelion ball on a thin stem? No, guys, the same law applies to the neck as to the biceps: the bigger the better! By the way, for the information of those “aesthetes” who strive for ideal proportions. An old axiom says that your biceps, calves, and neck should all have the same circumference. So figure out if everything is okay with your neck.
Angles of attack
The musculature of the neck consists of one and a half dozen different muscles. This is why the neck is much more mobile than any other part of the body. The inevitable price to pay for such hypermobility is a high probability of injury. So you need to exercise the neck muscles with extreme caution. And if you have problems with your neck, be sure to consult with your surgeon about acceptable loads. One important point: warm up thoroughly before each neck exercise. Before starting a “working” set, do 1-2 light warm-up ones. In other words, if your routine consists of four exercises, you should do at least four warm-up sets. A lot of? Only at first glance. In fact, these sets will take you just a few minutes, but they will help you reliably avoid injuries by preparing your neck muscles for stress. Remember this, even if you completely forget all the other tips in this article. The neck is capable of moving in three planes - longitudinal, transverse and vertical. Thanks to this, the head can take thousands of different positions. But since we are primarily interested in training the neck muscles, let’s simplify the complex system of movements. Let's exclude those that are performed relative to the vertical axis (rotational): for example, “shaking” your head from side to side when you say “no”. By loading your neck in this plane, you risk damaging it. In addition, such movements do nothing to increase strength and “mass”. To achieve maximum effect, it is best to work in two planes: the so-called sagittal (dividing the body into left and right halves) and horizontal (dividing the body into “front” and “back” parts). Movements in these two planes can be graphically represented as intersecting lines (see “Planes of Movement”). Some neck muscles also work when lifting your shoulders, but only to a small extent. The shoulder girdle is driven primarily by the trapezius and levator scapulae. When training your shoulders and back, don't forget to do shrugs and pull-downs to your chin. Then your neck will merge with your back and shoulders into one powerful whole.
Exercises
So, I offer you three types of movements: neck extensions, flexions and side tilts of the head. During extension, the main load falls on the plaster muscles of the head and neck, semispinalis capitis and neck, levator scapulae, superior erector spinae and trapezius. Do you know how they used to do neck extensions? They put a noose on their head, attached a weight to it - and off they went. I became acquainted with this instrument of torture at the age of 17. The power it developed was too much for me at the time. In addition, the noose kept slipping off my head. It’s hard to say what was the reason - poor biomechanics or my hairstyle at that time. In any case, I threw the damn device in the trash and began looking for something more efficient.
Smith machine neck extension
The best neck extension exercise I know was taught to me by a guy nicknamed “Nutty.” When I first saw how he shook his neck, I thought: this is a kamikaze! But then I tried it myself and was amazed to discover: this exercise is not only fantastically effective, but also absolutely safe! Place the Smith machine bench horizontally, as you would for a bench press. Fix the barbell at such a level that you can freely take the starting position. Use a padded bar or place a folded towel at the base of the skull. Then move your head under the bar so that it rests on the towel as close to the base of the skull as possible. Place both hands on the bench directly under the bar, leave one foot on the floor, and place the other knee on the bench. Fix the position of your torso, keep your back parallel to the floor. If necessary, ask your partner to lift the bar. Bend your head so that your chin touches your chest. Then slowly begin to straighten your neck until your face is approximately “halfway” from horizontal to vertical. Remember, your partner had to be on guard at all times! To get comfortable with the technique, start with a minimal load, say, with a bar without weights. Do two sets of 12 reps (not including warm-up). This is a difficult exercise that a beginner is unlikely to cope with. Even if we are talking about one “naked” neck. Didn't it work out? Then try your luck on one of the special neck extension machines.
Neck extensions in a quadrilateral machine
In my opinion, the best of the “neck” exercise machines to this day remains the four-sided “Nautilus”. My friend, now a professional bodybuilder and formerly a famous football player, agrees with this. “I practiced a lot on the Nautilus,” he says. “And it helped me a lot.” During the game you constantly hit the ball with your head. And if it weren’t for my powerful neck, I probably wouldn’t have lasted so long in football.” The key to technical extensions in the machine is the correct position of the torso. In the starting position, the back is straight, the head is pressed against the headrest, and the chin is approximately 2.5 cm away from the chest. Place your hands on the handles and lean on them - this will help maintain a straight body position and prevent even minimal back extension. Everything below the neck must be absolutely motionless. The neck extension in the machine consists essentially of two movements: first, an up and back press (the head returns to a neutral position), then a light back and down press (the face rises to the ceiling). At the end of the extension, the face is facing a point that is approximately halfway between the wall and the ceiling. First, do warm-up sets, then two working sets of 12 repetitions. The second movement for developing the neck muscles is flexion. You lower your head down towards your chest, trying to touch it with your chin. In this case, the main load falls on the sternocleidomastoid, sternohyoid and stylohyoid muscles.
Lying Neck Curl
At first glance, this exercise may seem barbaric. But believe me: there is nothing more effective for the front of the neck. Lie across a horizontal bench so that your neck can move freely, but your shoulders rest with their entire surface on the bench. Fold the towel into a triangle and place it on the bridge of your nose. Then place a pancake (whichever you can handle) on this “mat”. Pressing it against your forehead, tilt your head back to approximately 45 degrees below neutral. Then lift it until your chin touches your chest. After warming up, do two sets of 12 reps.
Neck curl on a quadrilateral machine
Here again, the correct position of the torso is fundamentally important. To begin, stand up straight. It's not that easy: many neck trainers have too much resistance. Support the weight with your hands until you reach the starting position, then grab the handles and begin to bend your neck. The movement is smooth, arc-shaped, directed forward and downward. When your chin is approximately 5-2.5 cm from your chest, stop and return to the starting position. Do not tilt your neck back beyond the neutral position, otherwise you will have to arch your back. The number of sets and repetitions is the same as for lying curls.
Head tilts to the sides in a four-sided simulator.
The movement here occurs in a horizontal (longitudinal) plane. You try to touch your ear to your shoulder - bend your neck and tilt your head to one side or the other. The main work is performed by the sternocleidomastoid muscles, the plaster muscles of the head and neck, the semispinalis muscles of the head and neck, the anterior and middle scalene muscles. Personally, I believe that it is best to work them out on the same four-sided simulator. “Manually”, no matter how much you want, you will not be able to pump up the lateral muscles of the neck. Again, the maximum effect of this exercise depends on the correct position of the torso. To work the right side of your neck, sit down and firmly grasp the handles for stability. Place your head between the soft stops. In the starting position, the head is tilted approximately 45 degrees to the left, and in the final position, 45 degrees to the right. Thus, the entire range of motion is 90 degrees. Do warm-up sets for the right side, then two working sets of 12 reps. Repeat the same for the left side. When training your neck, do not be afraid to take heavy weights - of course, subject to clear technique and thorough “warm-up”. The whole neck complex will take you no more than 10 minutes. Do it once or twice a week - and you will be surprised at how quickly the centimeters necessary for “ideal proportions” will begin to “grow.”
Similar
Exercise options
If you can perform a classic wrestling bridge for a few minutes without much effort, then you're probably ready for the next step. The goal is to lift your hands off the floor. In this case, the body weight will be completely on the head and neck. As an intermediate step, you can prop yourself up on your toes.
There is also an exercise called the “wrestling bridge run.” To perform it, you need to take the starting position, as in the classic version, and then start running your legs around your head. The head is constantly turned to one side and does not come off the mat. The runs are performed clockwise and counterclockwise for several turns.
Bridge
The bridge is a basic physical exercise aimed at strengthening the ligaments and deep muscles that attach to the spine, hold it and provide mobility.
We classified the bridge as a basic exercise, since during its execution the hip, knee and ankle joints are set in motion, the muscles of the back, upper and lower extremities, as well as the muscles of the abdomen and thoracic region are actively involved. Thus, the bridge is a multi-joint exercise.
- Anatomy exercises
- Execution technique and main mistakes
- Types of bridge
- For beginners
- For those prepared
- For advanced
- Bridge training program
- Sources
Anatomy exercises
The bridge is an important exercise in the system of therapeutic and health training for the spine, the main purpose of which is to maintain the health of the musculoskeletal system.
The bridge trains many muscles. First of all, the deep spinal erector muscles, the so-called columns, are trained. There are more than thirty pairs of them. They all form two powerful cast and flexible cables that are attached to the spine and thereby hold it. In other words, they serve as the basis and support for the spine.
These muscles also have another important function - protecting the spine from various types of damage. The erector muscles work as a protective corset and at the same time provide a full range of movements of the spine - from straightening to deflection.
The performance of the spinal column largely depends on the condition of the ligaments and spinal muscles. In fact, any physical activity - from a simple turn of the head to complex exercises - affects the spine. And if the muscles around it are weak, then all these movements carry a potential threat in the form of vertebral displacement and compression injuries.
In addition, training the spinal muscles has a beneficial effect on the body and allows you to develop strength. The bridge is best suited for this type of training. Firstly, this exercise allows you to relieve the stress that the spine experiences every day as a result of human activity. Secondly, it stretches the spine in the right direction, strengthening the deep muscles responsible for posture. Third, it increases blood flow to the intervertebral discs, healing them, preventing degeneration and ensuring health.
In addition to the deep erector spinae muscles, the gluteal muscles, hamstrings, and upper body muscles—the shoulders and arms—receive their share of the load. The front part of the body - quadriceps, abdominal and chest muscles - is stretched.
Note: regular exercise of the bridge by stretching the chest allows you to increase lung capacity, which increases the overall endurance of the body. By engaging in arching of the back, the muscles and bones will be able to withstand more intense loads, allowing you to train with better results.
Execution technique and main mistakes
Technique:
- Lie on your back. Place your feet parallel to each other close to your buttocks.
- Bend your arms, placing your palms close to your shoulders. Emphasis on the palms and feet is the starting position
- As you exhale, push yourself off the floor by straightening your arms and legs.
- The back and lower back should be arched in the final position. The pelvis should be higher than the head and shoulders
- Hold at the top point for a few seconds and, while inhaling, slowly lower down.
Errors:
- Don't lean your head on the floor!
- Avoid sudden movements when lifting and lowering your body
- Do not turn your head during the exercise to avoid injury to the cervical vertebrae
- Don't overexert your neck muscles while trying to hold your head up.
- Don't hold your breath
Types of bridge
For beginners
- Bridge with emphasis on the shoulders
Technique:
- Take a supine position. Place your feet on the floor with your knees bent. Arms can be extended along the body
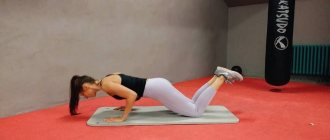
- Leaning on your shoulders, lift your pelvis as high as possible, slightly arching your lower back. Do not lift your feet off the floor, breathe evenly.
- Hold at the top for a few seconds and return to the starting position
2. Reverse plank
Technique:
- Sit on the floor. The legs are straightened and connected.
- Place your palms on the floor slightly behind you, shoulder width apart.
- As you exhale, lift your pelvis, torso, and legs so that you are standing with your palms and heels of your feet on the floor. Tuck your tailbone. Your body should form a straight line at the end point.
- Hold in this position for 15 - 45 seconds and smoothly lower down.
If you find this variation of the exercise difficult, you can make it easier by bending your knees.
3. Bridge from the bench
To perform this exercise, you will need a stable object that is approximately knee height. In this case we will use a bench
Technique:
- Sit on the edge of the bench, place your feet on the floor shoulder-width apart and lean your body back.
- Place your hands on the bench with your fingers pointing towards your feet.
- Using your hands on the bench, lift your pelvis and lean your body forward, keeping your hips hanging.
- From this position, pushing away from the apparatus with your hands, straightening your elbows and raising your hips, arch your back upward. In the final position, the head and shoulders should be completely separated from the support. Don't strain your neck or hold your breath
- Hold this position for a few seconds and then reverse the movement.
If you have difficulty bending down to fully straighten your arms, keep them slightly bent at the elbows.
4. Bridge on fitball
Technique:
- Sit on a fitball. Keep your back straight, feet firmly on the floor, hands on your knees or hips
- Extending your arms above you, smoothly move your body forward, leaning on the fitball.
- Place your arms back behind your head and gently roll your back over the ball.
- Slowly lean back and place your arms slightly bent at the elbows on the floor. The fitball is under your back
- Stay in this position for a few seconds.
- To return to the starting position, lie down on the fitball and smoothly, raising your head first, then your back, rise up the fitball to a sitting position.
During the exercise, be as focused as possible on your technique: do not let your feet leave the floor or let the ball roll to the side. Don't hold your breath. At first, try to do the exercise with a partner who can back you up.
For those prepared
- Bridge from the wall
Technique:
- Stand with your back to the wall at arm's length. Place your feet shoulder width apart
- Bending your knees and lifting your chin at the same time, begin to lean back until you see the wall on you.
- At this point, raise your arms and place your palms on the wall at head level. Fingers point down.
- Transfer some of the load to your hands. Bend your knees and “walk” along the wall with your hands, lower yourself down. When moving, keep your arms slightly bent at the elbows. Lower yourself slowly and smoothly using muscle effort.
- In the final position, your hands should be on the floor and you will be in a full bridge.
- Hold this position for a few seconds, then gently lower your back to the floor. Stand up and return to the starting position. Keep an even rhythm of breathing.
If you find it difficult to lower yourself to the floor, perform the exercise to a comfortable level, gradually lowering yourself lower.
2. Bridge near the wall with an upward climb
The exercise is performed similarly to the previous one, with the only difference being that you must return to the starting position by “walking” your hands up the wall.
For advanced
- Bridge from a standing position
The exercise requires a good level of training: strength, flexibility and coordination. Do not attempt to perform a bridge from a standing position without first mastering the approach exercise technique described above.
Exercise develops joint mobility, increases blood flow, and strengthens the muscular system.
Technique:
- Stand straight, feet shoulder-width apart, and place your hands on your waist.
- Bend your knees slightly, bend your pelvis forward and tilt your head back. You must see the space behind you.
- When you feel that further bending will lead to loss of balance, raise your arms. Bend your hands so that your fingers point back.
- Move your arms back as far as possible, arch your back, moving your pelvis forward. Keep your muscles tense. This will help you avoid losing your balance and falling backwards. Your task is to land softly with your hands on the floor behind your back.
- When your hands touch the floor, hold this position and slowly lower yourself to the floor.
You can ask your partner to secure you by holding his hand behind your back.
2. Lifting from the bridge to a standing position
The exercise requires good endurance, flexibility, coordination and strength. Your task is not to fall into the bridge, but to rise from it. Thus, the starting position is a bridge on the floor.
Technique:
- Get back to the starting position.
- Push your hands off the floor, swing your pelvis forward and bend your legs slightly.
- At the same time, using a powerful press force, lift the body to a vertical position
To increase the level of difficulty, try combining two exercises: lower yourself into a bridge position and then rise out of it.
Bridge training program
| Level 1 | Bridge with emphasis on the shoulders | 3 sets of 20 reps |
| Level 2 | Reverse plank | 3 sets of 45 seconds |
| Level 3 | Bridge from the bench | 2 sets of 20 reps |
| Level 4 | Bridge on fitball | 2 sets of 20 reps |
| Level 5 | Bridge from the wall | 2 sets of 10 times |
| Level 6 | Bridge near the wall with an upward climb | 2 sets of 8 times |
| Level 7 | Bridge from a standing position | 2 sets of 4 – 6 times |
| Level 8 | Lifting from bridge to standing position | 2 sets of 4 – 6 times |
Sources
- Brett Contreras "Anatomy of strength training using your own weight as a weight"
- Paul Wade "Training Area 1"
- Encyclopedia of Exercise
Alternative Exercises
Despite all the benefits of the wrestling bridge, harm from it can also occur if the exercise is performed incorrectly. Therefore, for beginners, you should consider other exercise options for developing neck muscles.
- Lie on your back and raise your head slightly. Begin to move your head back and forth fairly quickly but in a controlled manner, bringing your chin to your chest and then back again. Start with 20 or 30 reps per set. You can add a little resistance by pressing on your forehead with your fingers.
- Lie on your back on an exercise bench with your head on the edge. Now place the folded towel on your forehead and place additional weight on it. Raise your head up and down in the same way as in the previous exercise, but for fewer repetitions.
- Lie on your back as in the first exercise, but now turn your head from side to side, looking at one shoulder and then the other. Start with 10 reps on each side. This exercise can be alternated with the first one on this list.
- Neck straps, used by wrestlers and boxers, can be used to strengthen the extensor muscles in the back of the neck. They are made of leather with a soft cotton inner lining and a stainless steel chain to which you can attach additional weight.
Get a strong neck without leaving home
Those who are just starting to exercise their neck muscles should pay attention to the volitional gymnastics of Dr. A.K. Anokhin. All exercises are performed solely through one’s own efforts in a state of maximum muscle tension.
To do this, you need to strongly strain your neck muscles in each of the starting positions for 15-25 seconds. The length of time under load always depends on the level of physical fitness of the trainee.
Performing exercises to strengthen the neck muscles is useful for those who do not yet have basic training to perform strength exercises. It is not necessary to have special equipment or go to a fitness club.
Light resistance with your hands significantly increases the effectiveness of neck training when performing normal bends and turns of the head.
- I. p. - sitting, clasp your hands at the back of your head. Using muscle effort to overcome resistance, tilt your head back.
- I. p. - sitting, place your palms on your forehead. Similarly, overcome resistance by tilting your head forward.
- I. p. - sitting, palm resting just above the ear. Tilt your head left and right, overcoming the resistance of your hand.
You can perform these exercises from a standing position and even lying on the floor or on a bench.
The neck exercise with a ball is simple, effective and safe, with which you can start pumping up your muscles. The only drawback of this exercise is the lack of strength progression. That is, the resistance is determined by such parameters as the size, stiffness and elasticity of the ball. But over time, you can increase the number of repetitions.
It is necessary to place the ball close to the wall at forehead level, and using the muscles of the neck, rhythmically, but without jerking, press it into the surface. Do 3-4 working sets of 12-15 repetitions, then change position and perform the same, placing the ball just above the ear on each side, and then on the back of the head.