Standing forward bends are one of the important exercises for strengthening the muscles of the spine, buttocks, hamstrings and overall health improvement.
Standing forward bend is an important exercise for health. Think about how often you do bending in your daily life? For example, when picking something up from the floor or taking it from the bottom shelf. Moreover, incorrect execution of this movement, even in everyday life, often leads to injuries and pinching. Therefore, it is important to learn how to perform this movement correctly, as well as to practice this exercise regularly.
Benefits and features of the exercise
Leaning your torso forward is a very natural position for the human body. To perform the exercise you do not need special equipment or physical training. Its simplicity and accessibility allows you to safely include it in home exercise routines . The forward bend exercise affects the body as follows:
- Improves the flexibility of the spine, as well as the mobility of the hip joints, which has a beneficial effect on their health and prevents many troubles.
- Stretching of the hamstring joints, back muscles, buttocks, and abs is trained.
- Bends also improve blood circulation and reduce the risk of vascular diseases in the head.
Bend forward exercise: benefits and harms
About the dangers of bending forward
The human body as a biological machine has no analogues in the animal world of the Earth. But even this perfect apparatus has weak points, and with incorrect, non-physiological movements, a “breakdown” can occur. For example, non-functional, anti-physiological movements include rotation and forward bending of the torso in the lumbar spine. In the straightened position, rotation in each motor segment of the lumbar spine occurs only by 1°. Increasing the angle of rotation to more than 8-10° is only possible in combination with lateral tilt, forward and backward tilt. Therefore, an awkward excess of the angle of rotation instantly leads to twisting of the intervertebral disc, cracks and hernias! This happens especially often during rotational movements during shaping exercises.
The back and front of the human spine is tightly covered by the posterior and anterior longitudinal ligaments - powerful connective tissue cords that prevent the prolapse of the intervertebral disc when it is destroyed. In the lower lumbar region at the level of the IV and V lumbar vertebrae, the posterior longitudinal ligament bifurcates and does not cover the two lateral and medial parts of the intervertebral discs, therefore, at these levels cracks most often form, intervertebral hernias occur, which can appear even with the usual sharp forced tilt of the body forward or uncoordinated movement.
Static turns of 15–45° without additional support are especially dangerous, so pain and “lumbago” often occur when brushing your teeth or replacing a flat tire. To remove the load from the lumbar spine, you need to brush your teeth without bending the spine (Fig. 8, 9).
Rice. 8. Correct spinal position when brushing your teeth
Rice. 9. Incorrect spinal position when brushing teeth
To unscrew the bolts of a car wheel, you need to squat down without bending your torso at the waist (Fig. 10, 11).
Rice. 10. Correct body position when unscrewing wheel nuts
Rice. 11. Incorrect body position when unscrewing the wheel nuts
How to properly pick up objects from the floor
The load on the intervertebral discs in the lumbar spine increases 10 times when lifting objects from the floor due to flexion in the lumbar spine. When lifting a cloth moistened with water weighing 2–3 kg, the load on the lumbar intervertebral discs increases to 4.0–6.0 kg, therefore it is recommended to lift objects from the floor by bending the knee joints, or resting the knee on the floor (Fig. 12, 13, 14, 15).
Rice. 12. Incorrectly picking up objects from the floor
Rice. 13. Incorrectly picking up objects from the floor
Rice. 14. Lifting objects from the floor is especially dangerous for the lumbar spine
Rice. 15. Correctly picking up objects from the floor
How to lift and move weights correctly
The intervertebral disc in the lumbar spine can withstand a load of 420 kg/cm2. This means that every healthy person could lift and move a passenger car without harm to their health! But the question is how he will do it. If you bend your legs at the knee joints and, without bending your lower back, straighten them while moving the car, nothing bad will happen. If he lifts the car by flexing and straightening the lower back, a breakdown will occur in the intervertebral disc.
Correct tilts
Bend forward from a sitting position
Legs extended, knees pressed to the floor. The balls of the feet are pulled towards the face. Shoulders and back are turned. The lower back is in a neutral position.
The stretch is done through the heels and pulling back on the balls of the feet. The back remains straight. The buttocks are raised above the sit bones.
Bend forward from a standing position
The brushes rest heavily on the walls. The quadriceps muscles of the thigh should be tense. Legs straight, feet parallel to each other at a short distance.
The pelvis is raised, the knees are raised so that the legs remain straight. You need to lower your heels, removing the weight from the balls of your feet. We pull ourselves up in the direction from the index finger to the pelvis.
To perform forward bends of the torso, you do not need special equipment or physical training. Simplicity and accessibility allow you to safely perform them in combination with other exercises, just doing them at home.
Purvottanasana
Execution technique
1. Starting position – sitting on the floor with legs extended.
2. As you inhale, rotate your shoulder joints back, open your chest, lift your pelvis up and point your toes to the floor (photo 1).
3. If this position is difficult to achieve, then you can perform a simplified version.
Simplified version of Purvottanasana
Execution technique
1. From a sitting position, the legs bend at the knees 2. As you inhale, the pelvis rises up, the back is kept parallel to the floor 3. The stomach rises above the line of the hips 4. Look up 5. As you exhale, lower yourself down
Effek
T
This pose strengthens the wrists and ankles, ensures mobility of the shoulder joints, and expands the chest. It makes sense to perform it after Paschimottanasana.
Benefit
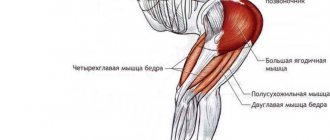
When performing bends correctly, the muscles of the back of the thigh and buttocks are primarily involved. In addition, the mobility of the hip joint improves.
Bends forward from a standing position help stretch the muscles of the spine, they become more elastic. At the same time, the spine itself becomes more flexible and stretches, the vertebrae fall into place.
Tibetan medicine also believes that lack of movement in the area of the large lumbar muscles leads to congestion in the intestines. And they, in turn, lead to poor liver health. As a result, the utilization of lactic acid decreases and the amount of slag products increases. The production of elastin also decreases, and intervertebral discs become depressed.
According to Tibetan medicine, the state of a person's youth is determined by the health of the liver, and the condition of the liver is determined by flexibility. The more often we bend over, the longer we retain youth.
Also, the work of our muscles affects the condition of blood vessels. Therefore, bending forward from a standing position is a good workout for the cardiovascular system.
Exercises for the spine - helping cerebral circulation
Why do it?
Leaning your torso forward is a completely natural movement for the human body. Performing the exercise does not require any physical training or sports equipment. It is ideal for independent training at home.
Effect on the body:
- Forward bending of the torso improves the flexibility of the spine and the mobility of the hip joints.
- There is a training session to stretch the hamstrings and muscles of the back of the thighs. Especially if you do the exercise with straight legs.
- Strengthening the muscles of the abs, back, buttocks.
- Improving blood circulation, preventing vascular diseases of the head.
"Boat"
The exercise promotes excellent warm-up of the lumbar spine and high-quality stretching of the muscles of the entire back. During the exercise, the abdominal muscles are strengthened. The result is a straightening of the shoulder girdle, a feeling of lightness in the body.
Warm-up for the back using exercises is performed according to the following scheme:
- lay on the stomach;
- with straightened upper and lower limbs, stretch in opposite directions, trying to properly stretch the spine;
- make a deflection in the lumbar region;
- arms and legs are lifted off the floor, held suspended;
- After holding for a couple of seconds in a tense state, relax the body and return to the starting position.
To achieve a high-quality back warm-up, you need to do about 7-10 repetitions of the exercise. Do not overload the local muscles. It is enough to relax your spine and feel the warmth in your muscles.
Tilts to the side
This exercise targets the external obliques. With good training with additional weights, they become noticeable, but for this you will need to go on a diet to remove the excess layer of fat (if any).
Attention! Bendovers by themselves do not burn belly fat. Without a diet, you will only increase your waist if you lean on this exercise, because the muscles will grow, but the thickness of the fat layer will remain unchanged.
Technique:
- The legs are spaced shoulder-width apart, the hands are on the belt or one on the belt and the other behind the head.
- Shoulders are straightened, hips are fixed, the lower back does not bend.
- Bend to the right, perform 10-15 repetitions. The tilt is carried out with a tense press.
- Perform 10-15 repetitions on the other side.
If bending is difficult, you can do it with slightly bent legs.
The exercise cycle begins with 10-15 repetitions of bending, 3 sets each. Over time, their number can be gradually increased. If it is necessary to increase the load, bending to the sides is performed with dumbbells in your hands.
Kakasana
Execution technique
1. Starting position – sit on the floor on your buttocks
2. Bend your knees, move your arms back
3. Pushing your hands off the floor, bring your stomach closer to your hips, without lifting your heels from the floor.
4. If in this position the heels do not come off the floor, then move your arms forward, and pushing off your elbows from your knees, stretch your back up.
Effect
This pose stretches the ankles and feet. This position stimulates intestinal function. If in Adho Mukha Svanasana the heels do not fall to the floor, then it makes sense to perform Kakasana regularly.
Tilt system for slimming the waist, abdomen and sides
First, let's figure out why these bends help you lose weight. Why are they special? Not all bending causes you to lose weight. You can do bends to strengthen the abs, serratus anterior, and lateral oblique muscles. Muscle mass in these areas will increase, but fat may not disappear. As a result, you will get plus 2 sizes at the waist instead of minus 2.
Bend-overs for weight loss are exercises that allow you to reduce body fat by consistently tensing different muscle groups in the lower body. Moreover, they are not aimed at increasing muscle mass, but at loosening fatty tissue and accelerating the removal of fat from problem areas.
General rules on how to do bending exercises for weight loss for women and men
- The exercises are performed alternately, 5 bends in each direction.
- Bend forward 3 times, then the body turns to the side, back or straightens, depending on the type of exercise.
- Do not bend over to lose weight on your stomach, waist or sides only when you wake up or just before bed.
- Do not bend over after eating or on an empty stomach. The optimal time is 2-3 hours after eating.
- Deflections in the back are not allowed; tilt your body straight.
Bends for slimming your waist
If your waist has become blurry and has lost its beautiful curve, special exercises will help. Simple bends to lose weight at the waist will get rid of unsightly fat deposits. It is better to do the exercises from a standing position.
- Stand up straight. Hands up, palms facing inward. Lean now to the right, now to the left, like a pendulum. The movements should be one whole, do them smoothly.
- Stand with your feet apart, hands behind your head. Make shallow turns of the body while bending in both directions.
- Stand straight, legs wide apart, arms raised above your head. Bend forward, trying to reach the toes of each leg with both hands.
- Keep your body straight, feet shoulder-width apart, bend your arms at the elbows and connect them at the top of your head. Bend to the left, forward, right, back, straightening up after each pose.
- Circular movements of the body in an inclined state without straightening. Try to bend as low as possible in all directions.
Bends for losing weight on the abdomen and sides
In order to lose weight on your protruding tummy and remove fat deposits from the sides, you can do exercises with or without dumbbells. Do bending over help you lose belly fat? Yes, definitely. You just have to do them correctly. The rectus abdominis muscles will contract significantly and cause the fat to melt faster when the body bends. If you bend forward every day 20-30 times, you will definitely see results. The main thing is to tense your abdominal muscles. So, learn how to do some exercises.
Side bends for weight loss
- Stand straight, hands on your waist. Lean alternately to the right and left. Try not to move your hips.
- Stand straight, one hand on your belt, the other (opposite the side of the tilt) up, palm inward. Tilt your body with your arm raised.
- Stand up straight, raise both arms up above your head, palms facing in. Bend over with your arms straight up.
- Stand up straight with your arms extended in front of you. Lean forward at a right angle, then, without changing position, pull your body with outstretched arms, either to the right or to the left.
- Position your body straight, raise your arms up and spread them slightly to the sides. We lean forward and down, trying to reach with each hand in turn to the toe of the opposite leg. The second hand is moved back as far as possible. Before changing hands, you need to fully extend.
Bend forward from a standing and sitting position to lose belly fat
- Starting position – stand straight, feet shoulder-width apart, hands on your waist. We bend forward with a straight back until the body angle reaches 90 degrees relative to the floor level. We stay in this pose for 1 minute.
- Stand straight, raise your arms up, bend them and place them behind your head. We bend down, trying to press the body to straight knees. We bend and unbend slowly.
- Stand up straight, arms bent at the elbows, placed behind your head. Lean forward and backward as far as possible.
- Sitting on the floor, place your hands behind your back as if they were tied to you. Lean forward, trying to alternately reach each shoulder towards the opposite leg. We do the exercise by straightening up after each bend.
- Sit on the floor, feet forward. Bend over with your arms extended forward, trying to reach your toes. After each stretch, straighten up and keep your back straight.
Table of the number of inclines for weight loss by day
How not to bend forward
In the video below I showed the correct and incorrect position of the back while performing the front fold.
It is recommended to perform forward bends while sitting on the floor at the end of each strength training session. I wish you successful studies!
Tilts to the side
This exercise targets the external obliques. With good training with additional weights, they become noticeable, but for this you will need to go on a diet to remove the excess layer of fat (if any).
Attention! Bendovers by themselves do not burn belly fat. Without a diet, you will only increase your waist if you lean on this exercise, because the muscles will grow, but the thickness of the fat layer will remain unchanged.
- The legs are spaced shoulder-width apart, the hands are on the belt or one on the belt and the other behind the head.
- Shoulders are straightened, hips are fixed, the lower back does not bend.
- Bend to the right, perform 10-15 repetitions. The tilt is carried out with a tense press.
- Perform 10-15 repetitions on the other side.
Types of exercises
The most common exercises:
- Flexion. The head moves down, the chin moves closer to the chest. For additional load, you can perform the exercise against the resistance of a belt or elastic bandage against which your forehead rests.
- Extension. The back of the head moves back, the head is thrown back. To increase efficiency, you can also use a tourniquet pulled from behind, or a barbell plate held by your hands.
- Lateral flexion. Bends to the side can be done from a lying position. By analogy with previous methods, the effectiveness of muscle strengthening improves if additional load is applied.
- Rotation. The chin moves towards the shoulders. The head rotates 360 degrees. You can help yourself with your hands so that your muscles stretch better.
At the beginning of the warm-up, all exercises should be performed without additional load.
The effect of asana on the body
The exercise belongs to the category of therapeutic and prophylactic exercises. In addition to the obvious effect of stretching the muscles of the back of the body, it is intended to eliminate slouching and correct minor scoliosis. The asana also has a beneficial effect on the condition of the spine as a whole, which, in turn, has a positive effect on the activity of all organs of our body.
The pose reduces appetite and regulates metabolism, which promotes weight loss and overall health. Over time, if performed regularly, you can achieve a reduction in fat on the abdomen and thighs.
Yoga practice helps calm the nervous system, relieves anxiety and improves mood. It is impossible not to note the beneficial effects of asanas on women’s health. They eliminate the symptoms of PMS and menopause, and also increase the chances of pregnancy.
Indications
In what cases should you perform the exercise:
- chronic diseases of the lower extremities;
- poor circulation in the pelvic area;
- digestive system disorders;
- diseases of the gastrointestinal tract;
- osteochondrosis;
- scoliosis;
- depressive states and anxiety disorders;
- high blood pressure;
- sleep disorders.
Contraindications
The exercise has some contraindications, in particular:
- displacement of intervertebral discs;
- arthritis and radiculitis;
- exacerbation of respiratory diseases, including seasonal allergies;
- pregnancy;
- sharp pain in the lower back.
Why do you need to do downward bends regularly?
Various human diseases, including those associated with changes in blood pressure, occur when there is a decrease in the circulation of energy in the legs. The feet are the main “output” of waste energy, and through the feet a person is filled with the vital vibration of the Earth.
Modern people are generally inactive, and there is no question of walking barefoot on damp ground.
The stagnation of waste energy increases and rises. It becomes more and more difficult for the heart to pump blood through the legs. Blood pressure (BP) gradually increases with age. The vessels are in a constantly increased tone. And tension in the cardiovascular system leads to fatigue and depression.
Diseases of stagnation occur - varicose veins, thrombophlebitis, constipation, and women's ailments, back and kidney pain, increased blood pressure and, as a consequence, headaches and hypertension. With high blood pressure, beta blockers are often prescribed, and they “hit” the energy of the heart, slowing down its work.
This is fundamentally wrong. With systemic vasoconstriction, hypoxia occurs in tissues and organs: there are signals that there is not enough oxygen (cold hands and especially legs), the body itself reflexively increases blood pressure...
The causes of hypertension are the fight against stress, physical inactivity, water-salt imbalance, poor nutrition and, of course, blocking the energy of the legs.
The main meridians of the gallbladder and liver, stomach and pancreas, bladder and kidneys are located on the toes. The kidney meridian begins in the center of the foot from the Yongquan point (translated as “whirlpool” or “source”), which needs to be stimulated. You need to cut out of wood (preferably oak) a small hemisphere with the diameter of a 5-kopeck coin. The flat side is placed on the carpet and the Yongquan point is stepped on, making rotational (to the point of slight pain) movements with the foot.
When there are pressure changes, it is useful to do simple exercises that train the blood vessels and heart, normalizing blood pressure.
Raise your hands up and hold for a long time - take a breath.
Then slowly bend towards the floor - exhale.
Stand, slightly bent, until the blood rushes to your head.
Slowly straighten up and relax. Repeat 5-6 times.
It is also useful to make slow bows while kneeling, or on the bed. When exhaling, bent arms press on the stomach, squeezing out the air.
In the evening, I recommend shaking your arms, then your legs, activating the source point - 3 minutes each. All vessels relax, and a slight pulsation will appear in the body, the pressure will begin to stabilize on its own.
When going to bed, you can take one valerian tablet. You shouldn't watch TV at night, it's better to take a walk in the fresh air.
I also advise you to pay attention to nutrition:
for breakfast - oatmeal with raisins, tea with hibiscus (Sudanese rose) with honey.
Evening tea - hawthorn (1 tsp), rosehip (1 tbsp) and a pinch of lemon balm herb. Pour 0.5 liters of boiling water over everything.
Source
Shall we turn on some music to set the mood?
Now playing:
Open Kluber FM website | iOS app | Android app
Execution technique
Initial position
Feet under the pelvic bones or a little wider; Arms can be stretched both along the body, if you plan to learn deadlifts, and above the head; The back is neutral, there is no need to remove the natural deflection of the spine with the help of a strong retraction of the abdomen; Bend forward is performed while inhaling.
Performance
Bend at the hip joints; Pull your pelvis back; Soft knees; Arms remain extended along the body or above your head; Bend to the depth to which your back remains straight; As you exhale, rise to the starting position and actively continue to perform the exercise; The pace of bending without weight is calm – flexion and extension while inhaling and exhaling. ►Bends forward without harm to the spine.
Watch this video on YouTube
Attention
- It is forbidden to perform the exercise at a jerky pace; a forced rise eliminates the possibility of working out the muscles, makes it easier to enter the bend, but does not allow you to control the position of the back. Speed work in this exercise is available only to well-physically developed gymnasts, who have access to both full amplitude and high speed; The head should not be raised, this will not help pump the muscles more effectively; It is also not worth placing the chin on the chest; Instead of jerking movements, you should smoothly lower and lift the body; The spine remains straight, natural lordosis is preserved; Extra movements of the knees like a classic deadlift (pushing off with legs) are excluded.
Janu Sirsasana
Execution technique
1. Starting position – sitting on the floor with legs extended.
photo 1
2. Bend your right leg at the knee, press your foot to your thigh.
3. As you inhale, raise your arms up, straighten your back, while exhaling, lower your arms down, grab the foot.
4. At the entrance, pull your chin up, straighten your back, try to bend in the thoracic region (photo 1).
5. If the hamstrings are poorly stretched, and it is not possible to grab the foot with your hands, then you can throw a belt over the foot or grab the shin with your hands.
photo 2
6. If the grip is good and the lower back is stretched, then as you exhale you can lower yourself lower, directing your stomach to your thigh, moving your head beyond the knee line (photo 2).
7. It is important that the shoulder joints are at the same distance from the floor and the sides are evenly extended, that is, the side of the straight leg is not pinched (photo 3)
photo 3
8. Keep the kneecap of the straight leg in a slight tone, pulling the knee towards the hip joint, pushing the “popliteal” down towards the floor.
9. Keep the foot of your straight leg at a right angle to the floor.
10. Stay in the pose for 5 breaths to 1 minute.
11. Perform the pose on the other side.
Effect
This asana tones the liver and spleen. Has a beneficial effect on digestion. It also activates the kidneys, which can be felt while doing this pose. It is recommended to stay in this position for a long time for those who suffer from prostate enlargement.
Execution technique
Initial position
Feet under the pelvic bones or a little wider; Arms can be stretched both along the body, if you plan to learn deadlifts, and above the head; The back is neutral, there is no need to remove the natural deflection of the spine with the help of a strong retraction of the abdomen; Bend forward is performed while inhaling.
Performance
Bend at the hip joints; Pull your pelvis back; Soft knees; Arms remain extended along the body or above your head; Bend to the depth to which your back remains straight; As you exhale, rise to the starting position and actively continue to perform the exercise; The pace of bending without weight is calm – flexion and extension while inhaling and exhaling. ►Bends forward without harm to the spine.
Watch this video on YouTube
Attention
- It is forbidden to perform the exercise at a jerky pace; a forced rise eliminates the possibility of working out the muscles, makes it easier to enter the bend, but does not allow you to control the position of the back. Speed work in this exercise is available only to well-physically developed gymnasts, who have access to both full amplitude and high speed; The head should not be raised, this will not help pump the muscles more effectively; It is also not worth placing the chin on the chest; Instead of jerking movements, you should smoothly lower and lift the body; The spine remains straight, natural lordosis is preserved; Extra movements of the knees like a classic deadlift (pushing off with legs) are excluded.
Paschimottanasana
Execution technique
1. Starting position – sitting on the floor with legs extended forward.
2. As you inhale, extend your arms up.
3. As you exhale, lower your arms down and grab your feet with your hands.
4. As you inhale, stretch your back up, move your shoulder joints down, and direct your stomach toward your hips.
5. In this position, it is important to stretch your back from the tailbone to the cervical vertebrae. Place your belly on your hips.
6. As you exhale, lower yourself down, stretching your head forward, moving your chin behind your knees, and pointing your forehead toward your feet.
7. Stretch the hamstrings and direct them towards the floor.
8. Tighten the kneecaps by tensing the thigh muscles above the knee.
9. As you exhale, lower yourself lower and relax.
10. Hold the pose for 5 breaths to 3 minutes.
11. While inhaling, exit the asana and go to the starting position.
Effect
This asana tones the abdominal organs and eliminates their lethargy. It has a beneficial effect on the kidneys, rejuvenates the spine, and improves digestion. Staying in this position for a long time (more than 5 minutes) massages the heart. The lower back is stretched, more blood flows to the gonads. This helps improve the functioning of the reproductive system.
