Military two-handed kettlebell press: video
What muscles are worked?
Thanks to the jerk, the arms, chest muscles, and rear delta are trained.
The best way to work the neck and middle delta is by doing the squat and lift.
Training the whole body with kettlebells is not a myth, but the experience of many athletes. You just need to be patient and motivated.
Rules for performing the exercise
Each exercise with weights is technically more difficult, so it is imperative to stretch your hands and shoulders well before starting the exercise so as not to injure your joints.
Initial position:
Before starting the exercise, the weights are placed between the legs. Feet shoulder width apart. Throw the weights over your shoulders and press your elbows toward your body. Straighten your legs at the knee joints.
Position 1:
Remaining in the starting position, spread your elbows to the sides. Make sure your elbows don't go back.
Position 2:
Straighten your arms vertically upward. Avoid jerking, the movement should be uniform. When the weights pass the level of your head, lean the weight back so that your hands go behind your head. Tighten your lats, pelvis, and abdominal muscles for added stability.
End position:
Bend your arms and return back to position 1. Bring your elbows towards your body. This is your starting position.
Repeat the exercise as many times as necessary. Variations of the military press with kettlebells can be the military press with a barbell or with kettlebells while standing and sitting. You can see the detailed technique for performing the exercise in the following video.
Correct standing press technique
The standing kettlebell(s) press can be divided into 6 elements:
- start;
- chest cast;
- main start;
- climb;
- fixation;
- lowering.
Let's look at the simplest option - this is a standing kettlebell press with one hand (see video below).
In the starting of the kettlebell, the legs are shoulder-width apart or slightly wider, the kettlebell is installed in front 15-20 cm from the line of the toes, the legs are bent at the knees, the torso is tilted forward, the back is straight, the working arm is straight, gripping the handle of the kettlebell with an arbitrary grip (usually from above or neutral), the free arm is straightened and pulled back, the head is in a neutral position.
The chest throw begins with the weight coming off the platform and the backswing being made. After that, during the forward swing, due to the efforts of the legs and back, it is accelerated, a lift is performed, and the weight stops in the main start position. This element can be considered as a separate exercise, and it is worthy of being described in more detail, but I see no point in doing so, since the first two elements are performed only once at the beginning of the exercise.
In the main start ( Fig. 1 ), the kettlebell is located between the shoulder and forearm of the athlete from the outside, the shoulder is pressed to the body, the torso is slightly tilted back, the legs are straight, the head is in a neutral position, the free hand is lowered down, the upper corner of the kettlebell handle is located on the base thumb, the middle of the handle is in the middle of the base of the palm, the forearm is in a curve between the handle and the body of the weight, the fingers are bent. ( Figure 2 ) Improperly holding the kettlebell can cause injury to the wrist and forearm tendons.
Rice. 1. Main start position.
Rice. 2. Grabbing the handle of the weight.
During lifting , the arm is simultaneously straightened in the shoulder and elbow joints, the elbow is constantly directed forward, the center of gravity of the weight is above the elbow joint of the working arm, the body and head are slightly retracted back, the free arm can be retracted forward or to the side to maintain balance. A typical mistake when performing this element is to move the elbow to the side, which can lead to serious injury to the shoulder joint (see video below).
In the fixation ( Fig. 3 ), the arm with the weight stops for a short period of time in a vertical position, while the elbow and shoulder joints are fully engaged, the head is in a neutral position and is in the same plane as the working arm ( Fig. 4 ), the free hand lowered down. Beginners often make a mistake called the “pigeon nod” head first ( Fig. 5 ). When performing a standing press, especially with a heavy weight, this can lead to displacement of the joints of the cervical spine.
Rice. 3. Position of fixation of the weight.
Rice. 4. Fixing the weight (side view).
Rice. 5. Dive head first (no need to do this!)
While lowering the weight, all the same actions are repeated as when lifting, only in reverse order.
When performing a standing kettlebell (kettlebell) press for a number of times, elements three through six are constantly repeated in a given sequence.
After the specified number of repetitions is completed for one hand, the hands are changed and the same is repeated for the second hand.
When performing a standing kettlebell(s) press, the legs should always be kept straight and the feet should remain in full contact with the platform at all times to prevent cheating.
Muscles involved in the exercise
Let's see which muscles are involved in the work when performing this exercise. The main muscles that work in the double kettlebell military press are the deltoids and the entire shoulder trunk. The greatest load goes to the front and middle deltas.
In the military kettlebell press, auxiliary muscles are also present - these are those muscles that are less involved. Among them are the triceps brachii and triceps - when the press is performed correctly, the medial bundle takes on the main load.
In this exercise, stabilizing muscles should also be mentioned: leg muscles, core muscles, gluteal muscles, which provide coordination.
Complex with weights 3 exercises
"Gladiator"
Take a side support position with your straight arm. Raise your unsupported leg and keep it suspended. With your other hand, press the kettlebell away from your shoulder. After completing all repetitions, roll over to the other side.
The load in the exercise comes to the whole body, due to keeping the body static. The kettlebell press has also been added to the dynamics. This movement works the shoulder muscles well.
Kettlebell Squat Press
Get into a squat position, holding a kettlebell overhead with your straight arm. The weight in the other hand rests on the floor. Stand up from a squat while simultaneously lifting and pressing the second kettlebell to your shoulder.
Aerobic exercises. Plus, it works all the muscles of the body. We work our shoulders with emphasis from pressing the kettlebell up.
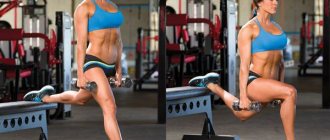
Weighted Walking Lunges
Squeeze two weights onto straight arms and do alternating walking lunges. Walk in this style for 10 meters, then turn 180 degrees and, without lowering the weights, return to the finish line, continuing to lunge.
This exercise is quite complex and is not suitable for all athletes. The muscles of the whole body work: shoulders, back, arms, core muscles in a static manner, from holding dumbbells above you. The leg muscles also work dynamically.
Key mistakes when performing the exercise
- Most beginners lift heavy weights the first time they perform a military press. Lack of proper technique can result in joint damage. Start with 8 or 12 kg weights and once you feel confident, increase the weights.
- Do not make sudden jerks or lower the weights below the required level. This also risks injury and imbalance of the entire body.
- A common mistake is rounding the back, which puts a lot of stress on the spine, which can lead to injury to the lumbar region.
Before performing the exercise, you need to warm up well. The following video presents an option for warming up the shoulders, back and lower back.
Example workout
Strength exercises should be performed in the form of complexes.
In general, the training scheme looks like this:
- Warm up. Particular attention should be paid to cardio exercise and joint work.
- Lifting a weight. Starting position: standing, arms down along the body. Moving your elbow to the side, you need to slowly lift the equipment to your sides. Stay at the top point when the projectile is at the shoulder. Return to starting position. Do two approaches 5-8 times.
- Side bends. Keeping your legs at shoulder level, you need to slowly lean towards the palm unoccupied by the projectile. Minimum repetitions – 10-12 times in each direction.
- Kettlebell snatch. A detailed description of the exercise will be given in the next section.
Benefits of doing the exercise
- Development of flexibility . By improving joint mobility, you improve their flexibility. While in the top position, you can move your body forward and move your arms back a little, thereby stretching your shoulders, lats, and abdominal muscles.
- Increased strength. When performing any exercise with a kettlebell, the whole body is involved in the work. Also, thanks to the unusual shape of the projectile, you need to react in time when the weight deviates from the proper trajectory.
- Development of mobility of the shoulder girdle and forearm. Upon reaching the top position, the kettlebell rests on the back of the forearm. As a result, the joints are stretched. This allows you not only to increase the strength of the joints, but also to increase their range of motion.
Technical features of the movement
Athlete's starting position:
- A competent technique for standing kettlebell press allows you to redistribute the weight of the body and the apparatus so that the athlete’s shoulders are perfectly level; lowering the shoulder of the working arm is not allowed. We approach the kettlebell as if we were approaching a deadlift barbell. The projectile is installed on the floor. Due to flexion in the knee and hip joints, tilt is achieved. The projectile is grasped by the handle with a direct grip (fingers clasp the handle of the weight). The body is brought into a vertical position, the joints of the legs are extended, and the projectile is raised to the chest.
- Here it is important to stop the inertial movement of the weight by contracting the abdominal muscles, tensing the hips and buttocks, as well as the back muscles. The forearm is perpendicular to the floor, the weight is in the hand, sideways outward (extension of the hand from the midline of the body).
Pressing movement:
- It is important to exclude a half-push with the legs (shvung), so the body does not relax during the press;
- The athlete extends his arm at the elbow joint under control and moves the weight upward along an elliptical trajectory. At the top, with the elbow extended, the weight hangs sideways outward, from the midline of the arm;
- Reverse movement - bending the elbow and lowering the projectile onto the chest to the starting position;
- The non-working arm can be set slightly to the side and tense, or fixed along the body. It is not recommended to place your arm at your side, as this may cause the shoulder of the working arm to drop.
After completing the movement, the weight drops down and moves to the second hand through the swing. After lowering, the athlete pushes forward with his hips, the weight is held by his hand, and the change of hands is carried out in the air at waist level. If this is difficult, the projectile is placed on the floor and taken from it again.
Alternative replacements for the two-arm kettlebell military press
To avoid the mistakes listed above, we advise you to replace this exercise with alternative ones, which are also aimed at developing the shoulder girdle.
One such exercise is the seated dumbbell press. In this case, the vertical load is minimized by fixing the spine, which allows maximum use of the deltoid, trapezius and triceps muscles.
Seated dumbbell press
The next exercise is considered one of the most technically simple exercises for the deltoid muscles - this is a bent-over row of a barbell to the chest. The exercise is performed with both a narrow and wide grip, with a natural deflection in the lower back. Concentrate on working your deltas, turn off the trapezius from work, and pull with your shoulders.
Bent-over barbell row
Also, one of the best alternative exercises is the seated barbell press in a Smith machine. We especially recommend this exercise to beginners, since in this simulator the bar moves along a vertical axis, which allows you to eliminate stabilizer muscles from the work.
Seated barbell press on a Smith machine
Standing kettlebell press in training plan
The benefit of the kettlebell press is that it requires concentration and stabilization. It teaches the correct upward pressing movement, and is a lead-in movement to the popular CrossFit pushes, barbell thrusts, and standing presses. It allows you not only to gain upper body muscle mass quickly, but also to develop the neuromuscular connection required for strength training. For women, this exercise will help avoid imbalances in the upper and lower body, and work the center of the body under load, preparing the body for heavy basic movements with a barbell.
The standing kettlebell press should be the first exercise in a beginner athlete's training plan to achieve full concentration on muscle contraction and quickly develop technique.
Preparation before training
Warm-up is the most important part of functional training. Thanks to warmed up muscles, saturated with blood, the results of training increase significantly. In addition, the risk of unpleasant consequences, such as pressure surges, or muscle strains or injuries, is reduced.
The universal warm-up complex consists of:
- Joint gymnastics. It is necessary to pay attention to the shoulder and elbow joints, as well as the wrists.
- Stretch marks. Lunges, various bends of the torso and placing the upper limbs behind the back will perfectly prepare the muscles for work.
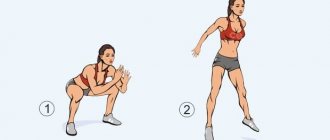
- Cardio elements. These include running and any kind of jumping. You can also do squats at a fast pace.
At the end of the warm-up, it is recommended to rest for a minute to allow breathing to recover, and then proceed directly to training.
The total time for warming up is from 10 to 15 minutes.
