6 June 2021 Admin Home page » Tips and tricks
In this article, learn how your feet affect squats and deadlifts, how strengthening your feet affects leg strength, important tips and tricks.
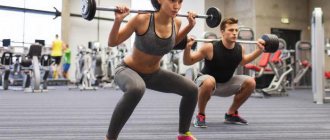
Arriving at the gym, especially during rush hour, you can see the gym boars who squat 180 kg, and deadlift is about 200 kg, their main attention is paid to the correct technique and progression of the load, but on increasing the strength of the feet, attention if there is , then it’s very minimal, but in vain - strong feet for strong legs, strengthening them will give you better results.
The whole path to achieving new heights begins from the floor, from the very foundation of the body, which is the feet, pay attention to them, and do not throw them aside, considering it a trifle and an unnecessary matter that should be paid attention to.
Below we will tell you how your feet affect the strength of your legs, what is the best position to take, and some basic skills for foot stability. When you read everything, you will understand why feet are so important.
Feet are a powerful foundation
Our feet are the starting point of support in movement; it is from them that the entire complex process of the musculoskeletal system begins. Of course, many people pay attention to the correct position of the feet, but do not fully understand what kind of connection occurs between the feet and legs in the complex biomechanics of movement.
The foot is a flat bone base, just think about it, it contains about 26 bones, and this is not much, not less than almost ¼ of all the bones of the body! It also has a large number of muscles that stabilize the foot on the surface. When there is a load on the foot, the distance between the toes increases, but the muscles contract intensely at this time.
When the muscles in the feet contract, an impulse is sent to the brain, and from there a command is sent in the form of nerve impulses to trigger muscle reactions, as a result of which all the muscles of the legs contract.
The stronger the feet, the more powerful the impulse for contraction of the leg muscles, all this will be reflected in an increase in working weight in training.
Exercises for leg muscles with attachment
There are many ways to quickly pump up your legs using additional means. For some, this is an additional incentive not to quit training, for others it is a combination of business and pleasure, for others it is an opportunity to increase the load.
- The step board perfectly strengthens the calves. For greater effect, you can use various weighting agents.
- Jumping rope. Of course, you can borrow a projectile from a child, but it’s better to buy your own. The jump rope is inexpensive, and in terms of strengthening the leg muscles it works just fine. Can be done for both men and women. The only downside is that you can’t really jump in an apartment building.
- Various home exercise equipment: bicycle, treadmill, stepper, elliptical trainer and the like. Of course, they are not cheap, but they will help you quickly pump up your legs and lose excess weight. They are convenient because you can control the speed, pressure, and you can create individual programs.
- Swimming. One of the best sports for those who think about their figure and their health. Exercises in the pool train the muscles of the legs, back, arms, strengthen the spine, lungs, and heart. Classes three times a week will be enough.
- Bike. The popularity of cycling is growing every year. Most, of course, buy this vehicle just for fun. But, besides this, cycling will help you build up your leg muscles and get rid of fat deposits, if any. Alternatively, you can buy an exercise bike for home so you can exercise all year round.
- Roller Skates. Following the bicycle, this means of transportation has become very popular among adults and children. They can be ridden by both men and women, regardless of profession and size. Lots of fun and a great way to strengthen your leg muscles.
- You can also include dumbbells, special leg weights, uniforms, and the like as financial costs. But these things are necessary for those who want to do exercises for beautiful legs effectively and correctly.
As you can see, it is quite possible to combine the pleasure of exercise and muscle training. Choose what you like best and start striving for your legs to be beautiful, strong, and resilient.
Feet as a whole
In addition to participating in muscle contraction, our feet regulate the position of the hips, legs, knees and coordinate the movement of the entire body. This is especially important in squats and various types of deadlifts, so the feet should be slightly turned outward by 20-30 degrees , this will allow you to additionally include the external muscles of the legs, hamstrings (back) and external pelvic muscles, and the more muscles are included, the more weight you can lift and this is a direct path to increasing strength and increasing volume.
To create a dense base, first press your big toe firmly into the floor, then your little toe and lastly your heel , usually everyone tries to place the heel firmly on the floor and pay attention that it does not come off the floor, additionally make sure that the toes are also connected with a death grip with the surface.
All this will allow you to coordinate the joint work of the feet - knees - hip joints, so maintain the correct position of the feet from A to Z of the exercise. Before picking up a barbell, first pay special attention to your feet and only then to the initial position of your torso and correct technique.
How not to cause harm
The main disadvantage of working out not in the gym, but on your own, is that in the pursuit of beauty you can harm your health. Therefore, if you decide to pump your legs at home, you should not only perform the exercises correctly, but also be sure to follow the following recommendations from experts.
- Be sure to consult your doctor first. If you have problems with blood vessels, the heart and the musculoskeletal system, many exercises should be performed with caution. Excessive effort or improper training can lead to a worsening of the condition.
- Be sure to warm up before class.
- Wear comfortable clothes that will not interfere and will not rub or pinch anywhere. Girls are recommended to purchase a special T-shirt that will support their breasts.
- Try not to overwork yourself. If you are just starting training, do several approaches.
- Keep your back straight and your feet parallel to each other. This way you will train only those muscles that are required and will not damage other areas.
- Drink plenty of water. During training, a lot of fluid leaves the body, which needs to be replenished. Therefore, keep a bottle of clean water next to you and constantly drink in small sips.
- Monitor your well-being. If you feel dizzy or your pulse is outside the normal range, you should stop training. And at the first opportunity, be sure to consult a specialist.
- Make it a habit to eat healthy. If you want to pump up your legs, then you should consume more protein foods. Protein is the main builder of our body and you simply cannot do without it. A man who wants to quickly build muscle should especially lean on such food.
All these rules are quite simple to follow, but will help you train more effectively and without harm to your health.
Foot massage
The feet are actively involved in the movement of the whole body, they are the first to take the blow and all the time take the rap for where we walk and jump, whether they want it or not, they are faithful companions and helpers. So let's periodically thank them for this and provide them with holiday and relaxation.
To do this, use a foot massage, using, in addition to the usual kneading with your fingers, place a tennis or golf ball on the floor, step on it and simply rock and roll your foot on it. Efforts should be constantly increased, but do not allow pain; the massage should last about 1 minute for each foot.
Rolling the ball stimulates the nerves that are present in large quantities in the foot, the effect is like warming up a car engine before driving. Therefore, massage is effective after sleep or while warming up and stretching muscles before exercise.
What is endurance?
Endurance is the ability to perform physical work without reducing its effectiveness. A resilient person can perform a certain movement for a long time without experiencing any particular difficulties and without getting so tired that he is forced to stop.
True, here it is worth immediately understanding what periods of time and what kind of work we are talking about. And about what loads. For example, you can jog for literally hours. Is it endurance? Yes. What is it to do a set of 30 pull-ups? This is also endurance! But in other exercises. And, of course, no one can do pull-ups for several hours in a row. A few minutes at most. You can do push-ups on the floor for 10-15 minutes. This is also endurance that can be trained.
Strengthening the feet
Massage is not the only way to help the feet; in order to have strong feet for strong legs, it is not just hearsay, they need to be strengthened. To do this, stand on a step or other elevation, firmly placing emphasis on your thumb, while lifting the other 4 up as much as possible.
Having risen up, hold for 10 seconds, then do everything exactly the opposite, focusing on 4 fingers, and the thumb remains suspended. You can then rest for 1-2 minutes and perform the exercise again, and if you can withstand the load, then perform it immediately without rest on each side 2-3 times.
Make it a rule and start your morning with this simple but very effective exercise; strong feet for strong legs will never be a hindrance in life.
Place your feet correctly at the beginning of the exercise, play by rolling a ball along your feet in the morning, train your feet by rising on your toes, and you will definitely make your body stronger from the very tips of your toes. I hope now you know that strong feet are a big plus for strong legs.
Methodological basis for developing leg strength in powerlifting.
The material in this section is intended, first of all, for fairly qualified powerlifters who want to increase their performance in the squat exercise with a barbell on the shoulders.
We offer you several options for training programs.
Classic program for 9 weeks (proposed by leading Russian athletes)
| 1st training | 2nd training | |
| 1 Week | 80% 6x3 | 80% 6x2 |
| 2 week | 80% 6x4 | 80% 6x2 |
| 3 week | 80% 6x5 | 80% 6x2 |
| 4 week | 80% 6x6 | 80% 6x2 |
| 5 week | 85% 5x5 | 80% 6x2 |
| week 6 | 90% 4x4 | 80% 6x2 |
| week 7 | 95% 3x3 | 80% 6x2 |
| 8 week | 100% 2x2 | 50% 3x10 |
| Week 9 | 105% 1x1 | — |
Auxiliary exercises for developing leg strength 1st workout
- Classic squats (as planned).
- Half squats with a barbell on the shoulders with a weight of 90-100% 3/6.
- Exercises on the machine for the front and back of the thigh 3/10 for each muscle group, respectively.
- Exercises for the lower leg muscles - 3/15.
I'm training
- Classic squats (as planned).
Comments on this program:
- The main goal of this program is to develop general leg strength in the preparatory period (“base”). The percentage training weights are calculated individually for each athlete based on the best (currently) results in squats (from the maximum weight for 1 time!);
- tights and bandages are recommended to be used when the working weight exceeds 85-90% of the maximum (if necessary);
- and most importantly - if you can squat 80% - 6x6 without equipment, then your result with equipment can be 110-115% of the maximum without equipment for 1 time!
The following program for back squats should be used immediately after finishing the classic one. This will allow you to “punch” the result further.
9 week strength program
| 1st training | |
| 1 Week | 55 - 60% 1x15 |
| 2 week | 65% 1x12 |
| 3 week | 70% 1x10 |
| 4 week | 75% 1x8 |
| 5 week | 80% 1x6 |
| week 6 | 85% 1x5 |
| week 7 | 90% 1x4 |
| 8 week | 95% 1x3 |
| Week 9 | “passing” or participation in competitions (97% 1x1); (102% 1x1); (105 - 107% 1x1) |
Auxiliary exercises for developing leg strength 1st workout
- Classic squats (as planned).
- Hold the barbell on your shoulders for 1x10 seconds. 120-150%.
- Hack squats or leg press - 5x5.
- Exercises on the simulator for the front and back surfaces of the thigh - 2x15 for each muscle group, respectively.
- Exercises for the lower leg muscles - 2x15.
I'm a day (easy)
- Delayed squats - 50-60% - 4x4.
- Slow squats (10 sec. down + quickly up) - 50 - 60% - 3x3.
- Exercise on the machine for the front and back of the thigh - 2/15 for each muscle group, respectively.
Comments on this program:
- percentage training weights are calculated individually for each powerlifter based on the best (currently) squat results;
- equipment is used when working with weights starting from 80%, i.e. from the 5th week:
- In the 1st workout, it is recommended to perform all auxiliary exercises “to failure”, i.e. load your legs as much as possible;
- 2nd workout: auxiliary exercises are recommended to be performed until mild fatigue (at half strength). That's why the 2nd workout is called easy, because. recovery is necessary for the next workout;
- in the 8th week, before the “walking”, the 2nd workout (light) for squats is not recommended, because Full recovery must be achieved before maximum load.
Wave-shaped strength program
| 1st training | |
| 1 Week | 65% 3x8 |
| 2 week | 70% 3x6 |
| 3 week | 75% 3x4 |
| 4 week | 55% 2x12 |
| 5 week | 70% 2x8 |
| week 6 | 75% 2x6 |
| week 7 | 80% 2x4 |
| 8 week | 60% 2x15 |
| Week 9 | 85% 1x6 |
| 10 week | 90% 1x4 |
| 11 week | 95% 1x2 or 1x3 |
| Competitions 95%, 100 - 102%, 105% |
Comments on this program:
- equipment is used when working with weights exceeding 85%, i.e. from the 9th week;
- auxiliary exercises are identical to the exercises of the previous program for 9 weeks (see above);
- calculation of the absolute values of training weights is carried out individually for each powerlifter in accordance with the percentage values of the best (currently) results in squats.
Of course, we could not answer all the questions about the development of yoga strength in powerlifting. Theoretically and practically this is impossible, because There are a lot of training programs; our recommendations make up only a small part of the proposals.
We hope that the material in this section will help you achieve certain successes, and most importantly, help you creatively select the most realistic training program to implement. And then the next program will be yours personally!
Bench press technique in powerlifting. Methodological instructions of the MSMK world champion M.D. Starov.
The bench press is the second exercise in the powerlifting competition program. Let's take a quick look at the technique of doing it.
In the starting position, the athlete lies on a horizontal bench and holds the barbell above his chest with outstretched arms. The bar must be lowered to the chest and then returned to its original position. The exercise is considered completed, the barbell can be placed on the stand. We emphasize that the exercise involves pressing the maximum possible weight 1 time. Of course, if you are interested in our recommendations, then you already have some experience in strength training and are familiar with ways to develop strength. And this, in turn, means that you already know this exercise very well and have performed it in training many, many times, because it is basic for the development of the chest muscles, as well as the triceps and deltas (anterior fascicles). It would seem that what can be considered here and what technical subtleties can be found in this simple exercise? But let’s not rush to conclusions and consider first how the bench press is performed in weightlifting and bodybuilding.
First - weightlifting.
When presenting this material, we will analyze the bench press exercise in the same way as was done earlier for squats. This approach is convenient because (in our opinion) this is a fairly successful form of presentation; in addition, the adopted analogy allows you to refer to previous material and not describe repeated points in detail.
The bench press is not a competitive lift in weightlifting. Here this is just an auxiliary exercise that is used to increase arm strength (along with the standing press). Since the removal of the standing press from competitive weightlifting, athletes no longer need exceptional arm strength. For them, speed and coordination of movements become much more important. However, holding the barbell on your chest requires significant effort. In this case, strong anterior deltoid muscles play a big role. In addition, holding the barbell overhead in the clean and jerk (and partly in the snatch) involves a greater load on the triceps. This is why weightlifting still uses the bench press (not often or regularly) as a way to develop deltoids and triceps strength. And therefore, the technique of performing this exercise is completely subordinated to the above purposes.
In order to maximally load the delta and triceps in the bench press, you need to choose a narrow grip. When lowering and raising the barbell, you should press your elbows as close to your body as possible. In this case, the barbell should touch the chest in the solar plexus area.
But weightlifters choose not a narrow, but a medium grip (shoulder-width apart) so that it corresponds to the width of the arms when doing the clean and jerk, that is, when performing purely weightlifting exercises.
Particular attention is paid to pressing the elbows towards the body, because this, firstly, allows you to relieve stress from the chest muscles, and secondly, it develops the correct stereotype of elbow movement when pushing from the chest.
In addition, as we have already indicated, explosive strength is important for squats in weightlifting, so usually the bench press is performed at a fast pace with the so-called “rebound” (i.e., the bar does not simply touch the chest, but sort of bounces off it a little, slightly increasing the speed).
And one last thing. Since the bench press is only an auxiliary exercise, it is performed with weights of 70-80 ° o from the maximum and almost no movements are made to the maximum weight. This means that special tricks are not required to improve the results in this exercise.
Summarizing all of the above, the technique of performing the bench press in weightlifting can be described as follows:
- The athlete lies straight on the bench without bending.
- The barbell is grasped with a medium grip (shoulder-width apart).
- During the movement down and up, the elbows are pressed against the body.
- The speed of the exercise is quite high. At the lowest point, the barbell “bounces” away from the chest.
Now we can move on to considering the bench press in bodybuilding. Here, the bench press is also not a competitive exercise. It is used only to increase the mass and volume of the pectoral muscles (to work the triceps and deltoids, the bench press with a narrow grip is used). To maximally load the chest muscles, the grip on the barbell is chosen wider than average. The athlete lies flat on the bench, without arching his back, so as to prevent “cheating.” During the press, the elbows are spread as wide as possible - this is the main requirement, the fulfillment of which allows the greatest load on the pectoral muscles. The pace of movement is medium or slow, which allows the maximum possible “pumping” of the muscles. In the bench press, as in all other exercises, bodybuilders use the principle of isolation, i.e. They try, if possible, to load one main muscle and exclude all others from work. And although the bench press is a “basic” exercise, i.e. involves a fairly large number of muscles. They try to minimize their number in bodybuilding.
Now let's look at the technique of performing the bench press in powerlifting.
The main feature of this exercise in powerlifting is that the bench press is a competitive exercise (and not an auxiliary exercise, as in weightlifting and bodybuilding)! The main goal is to lift the maximum weight 1 time. This means that it is necessary to use all possible technical techniques allowed by the competition rules.
Previously, we examined in detail several main ways to increase results in squats. But these same methods apply to any other exercise, including the bench press. Without dwelling on the details, we list the relevant recommendations:
- it is necessary to reduce the amplitude of movement to a minimum, because the weight lifted (maximum) is inversely proportional to the amplitude;
- to lift the maximum weight in an exercise, you need to connect the greatest number of muscles;
- The exercise must be performed evenly, without acceleration, and therefore at a slow pace.
Based on these three provisions, we will try to formulate a technique for performing the bench press.
First, let's look at how you can reduce the range of motion. The easiest way is to increase your grip width. Let us illustrate this in Fig. 1 (schematically).
As can be seen from the figure, the maximum amplitude of movement is equal to the length of the arm (if the grip is shoulder-width apart). The wider the grip of the barbell, the smaller h, which means the more weight we can lift.
So, the first recommendation is that the grip of the barbell should be wide. However, in order to avoid absurd situations, the International Powerlifting Federation has adopted the following rule: the distance between the hands (their inner part) should not exceed 81 cm.
Thus, 81 cm is the widest possible grip. And if you used to press with a medium grip, we recommend that you change it to a maximum grip! You will feel uncomfortable at first, but over time it will help you significantly improve your bench press results.
Note that this is not the only way to reduce the range of motion. There is another, not so obvious method. Look at Fig. 2.
As you can see from this picture, the chest can be lifted off the bench due to the flexibility of the spine (to make a bridge). Thus, the amplitude of movement will decrease by the amount ha-hb=h. And this value can be quite significant: the main thing is that over time, by increasing the flexibility of the spine, you can significantly reduce the range of motion and increase the weight lifted!
In addition, this technique is in no way limited by the rules, according to which only the head, shoulders and buttocks should be pressed to the bench. And such a “bridge”, as in Fig. 26, meets these rules. The only mistake that awaits you here is the following: when pressing the barbell up, there is a persistent desire to push the barbell with your chest, while tearing your buttocks off the bench. Take this into account! Don’t give in, and after a while you will learn to restrain this “impulse” and even use it to your advantage (we’ll tell you how later).
Now let's figure out how to connect the largest number of muscles to the movement.
First, the most obvious:
a) if the elbows are pressed to the body during the bench press, then the deltoids and triceps are maximally loaded;
b) if the elbows are maximally apart, then the pectoral muscles are loaded. Thus, you should choose a position for the elbows in which the load will be evenly distributed between all muscle groups: pectorals, anterior deltoids and triceps. It is easy to guess that this will be a position in which the angle between the body and the humerus will be about 45° (Fig. 3).
Of course, that's not all. We still have a lot of muscles that we would like to use (even partially).
Let us note that we have already achieved this when we advised you to stand on the “bridge”!
If you take a closer look at the position of the athlete lying on the “bridge”, you will notice that in this position during the bench press the load on the latissimus dorsi muscles increases significantly. Don't believe me? Observe from the side an athlete bench pressing while standing on a bridge (but only if he keeps his elbows at a 45° angle and does not spread them wide). And although the latissimus dorsi muscles are involved only indirectly, due to their strength and power, the load on other directly working muscles is significantly reduced. This, in turn, allows you to lift more weight.
In addition, the muscles of the legs and back are tense in this position. In general, the athlete seems to be standing on his feet and shoulders, only touching the bench with his buttocks. This provides, firstly, significant stability for the athlete, and secondly, it allows you to “cheat” with the pelvis, i.e. “beat” a little and push the barbell with your chest. And although this is prohibited in competition, in training this movement allows you to do a couple of extra “super reps” or lift more weight! This, of course, will affect the final result, because there is a so-called psychological attitude towards self-confidence!
The third advantage that the “bridge” gives in the bench press is the following circumstance: as you know, the pectoral muscles are divided into 3 parts: the upper, middle and lower bundle. It is not difficult to check and prove that the upper beam is the weakest, the middle one is slightly stronger and the lower one is the strongest (it is enough to do a barbell bench press on a board with an inclination of 45° upwards, on a horizontal board and with the board inclined at 45° downward: you will do the last exercise with the greatest weight). And when you bench press while standing on the “bridge,” it is the lower, most powerful, chest bundle that is turned on to the maximum! This means a gain of several kilograms!
Well, basically, these are all the basic technical techniques that can be used to increase your results in the bench press.
Let’s summarize all of the above and formulate the basic principles for the bench press:
- The athlete must rest his feet on the floor and his shoulders on the bench, only touching the bench with his buttocks, i.e. make a "bridge". In this case, you should try to “pull” your shoulders as close to the pelvis as possible.
- Feet should be wide apart for stability. In addition, your feet should be placed back, as close to your shoulders as possible.
- The grip of the barbell should be as wide as possible. those. 81 cm.
- The barbell should be lowered to the solar plexus area. The angle between the shoulder and the body should be 45° both when lowering and when pressing up.
- The movement of the bar both down and up should be uniform and slow. It is difficult to say unambiguously at what speed the exercise should be performed (this depends on the individual characteristics of the athlete). But in any case, the movement should be progressive and without jerking!
This technique may be difficult to reproduce in practice. First, the first few workouts. You will experience some discomfort and your bench press results may decrease. We recommend that you gradually change “your” technique, in several stages. What can you promise with confidence? Here's what: by mastering the proposed exercise technique, you can significantly improve your results in the bench press!
Now a few words about equipment.
Equipment for the bench press must ensure a minimum of injuries and comply with established rules.
The most dangerous places for injury when bench pressing are the shoulders, chest and hands. The following types of equipment are used to insure athletes:
- Wristbands, which are hard elastic bandages. They are wrapped around the wrists. Wristbands reduce the likelihood of injury to the hands and simply relieve pain in the wrists. We have already mentioned wristbands when considering the squat technique. Let us remind you that the same wristbands are used in squats and bench presses. Therefore, we will not dwell on their detailed description; let’s move on to the next type of equipment used in the bench press.
- Shirt (T-shirt) for bench press (blastshirt). The purpose of the shirt is to minimize injury to the shoulders and chest. In appearance, it resembles a regular T-shirt, made of very durable but elastic fabric (the same as a squat tights). Upon closer inspection, it becomes noticeable that the width in the chest area has been significantly reduced. And when the athlete puts on a shirt, it fits the body very tightly, as if “folding” the shoulders forward. During the press, when the barbell needs to be lowered to the chest, the material of the shirt in the athlete's chest area takes on a significant load. It stretches when lowered and, compressing, helps the athlete “tear” the barbell from the chest. Based on the principle of action, the shirt resembles a squat tights. Thus, wearing a shirt reduces the load on the muscles, ligaments of the chest and shoulders. This fact allows you to lift more weight in the bench press.
For a shirt, as for tights and bandages, the “total cumulative effect” is true. Let us clarify this point: using a shirt during training allows you to lift more weight, which means an increase in the intensity of the training process. The final consequence of these circumstances is an increase in results in competitions! However, there is also a flip side to the coin, namely: constant use of a shirt leads to a gradual weakening of the ligaments of the chest and shoulders, and when you take off the shirt, the possibility of injury increases. Therefore, we recommend that you train without a shirt and use it only during the last 3-4 weeks before competitions with heavy weights, for no more than 2-3 repetitions. This fact is due to the fact that, by tightly fitting (one might even say “tightening”) the chest and shoulders, the shirt somewhat impairs blood circulation in these muscles, and repeated repetitions are practically impossible to carry out. As for auxiliary exercises in the bench press, they should be performed without this type of equipment.
Finally, a few additional recommendations for using a bench press shirt:
- Just like squat tights, shirt size is very important. Those. This is purely individual equipment, the parameters of which depend on the weight category of the athlete. You need to select it very carefully. If the shirt is too big, then its use will have virtually no effect. If it's too small, you simply won't be able to put it on. Take these points into account and consult with a specialist when purchasing!
The shirt is one of the most controversial pieces of equipment in official powerlifting. The international federation IPF is constantly discussing its use. The main reason for the existing controversy is that there have been cases when the shirt was torn on the chest of athletes while lowering the barbell during competitions. In such situations, the athlete may unexpectedly fail to hold the barbell and, naturally, receive a serious chest injury. However, to date, the IPF leadership has not come to any concrete conclusion! Our advice: if you use the shirt in training or competition, be sure to have assistants watching closely as you perform the exercise!
3. Shoes for the bench press are not of particular importance. The only thing that is required of it is that it should be comfortable, and you should get used to working in these shoes.
Let's move on to the auxiliary exercises for the bench press.
Naturally, in order to have a high result in this exercise, training specifically only in the bench press is not at all enough. It is necessary to perform the entire set of auxiliary exercises, which, for example, are used in bodybuilding to pump up the chest, deltas and triceps. We will not list all these exercises. There are many books on bodybuilding that describe them. We will only mention those exercises that have some differences or nuances necessary in powerlifting to increase the effectiveness of the bench press.
1. Actually doing the bench press. This exercise has been discussed in detail previously. Once again, we would like to remind you that the bench press should always be performed using all the technical nuances inherent in official competitions. Remember that during training you not only train strength, but also develop a movement stereotype that should be brought to automaticity.
2. Holding the barbell or overloading The purpose of the exercise is to develop the habit of heavy weights and strengthen the ligaments. The starting position is like a bench press. Two assistants help lift the weight from the racks onto the athlete’s outstretched arms. He needs to hold the barbell in this position for 10 seconds, and then place it on the racks with the help of assistants. The weight of the bar should be 110-140% of the maximum.
3. Bench press negative. The starting position is the same as before. It is necessary to remove the barbell from the racks and very slowly lower it to the chest. Assistants help lift the barbell up. The weight of the bar should be 100-110% of the maximum. This exercise develops a trajectory for lowering a large weight (“habit” of the weight). It is usually performed in 1-2 repetitions.
4. Static bench press (isometric). It is necessary to install the barbell above the chest at a certain height. Lying on a bench, you should make maximum effort when trying to lift the barbell (naturally, the weight on it should be much greater than the maximum - you should not move it from its place!). This effort is carried out within a few seconds. It should be emphasized that there are several possible execution options for this exercise. For example: 1 repetition in 10 seconds, 2 repetitions in 5 seconds. or 3 repetitions in 3-4 seconds. The goal of this exercise is to learn how to get past sticking point in the bench press. For different athletes it is located at different heights. Thus, when installing the barbell, it must be raised to the height where you approximately have this “dead” point.
5. “Separate phase” bench press. In addition to the fact that there is a “dead” point in the bench press, in its vicinity the movement of the athlete’s arms slows down sharply and significant effort is required to overcome it. Thus, it turns out that not only one point is “dead”, but the whole phase of movement also turns out to be “dead”. Usually this phase is the main brake in the bench press. It requires special attention and appropriate practice. This is the idea of the proposed exercise.
The easiest way is to break the bench press into two phases:
I - movement from the chest to the middle of the trajectory;
II - movement from the middle of the trajectory to the final position, where the arms are straightened.
The starting position is like a bench press. The technique is the same as for the bench press. The only difference is that the movement is performed only to the middle (Phase I or II!). The weight of the barbell is usually the same as in the bench press.
6. Bench press through the board. This exercise is a modernization of the previous phase II bench press exercise. The starting position is standard for the bench press. One assistant places a narrow board (15-25 cm wide and about 10 cm thick) on your chest along your body and holds it in this position. It is necessary to lower the barbell until it touches the board, and then squeeze the barbell out. The modernization of the previous exercise is that the barbell does not need to be braked with your hands in the middle of the trajectory, but you can perform a “bounce” from the board. This allows you to significantly increase the weight on the bar, and therefore make this exercise more effective. In addition, in this exercise the same depth of descent is always worked out, which is difficult to achieve in any other way.
7. Bench press slowly. This is a regular bench press performed at a slow pace (about 3-4 seconds lowering and 3-4 seconds rising). The purpose of the exercise is to develop the correct technique and trajectory of movement. It is useful when you change your bench press technique and allows you to control the movement throughout the exercise.
8. Bench press with stops. This is also a regular bench press, but when moving down, 3 stops of 2-3 seconds are performed, and the same stops are made when moving up. The purpose of the exercise is the same as the previous one, only it is achieved through small static loads at the “problem” points of the trajectory.
The previous and this exercise can be combined:
- slow lowering (approximately 3-4 sec.) -+- press up with 3 stops;
- lowering with three stops (2-3 sec.) + slow press up.
9. Bench press with a narrow grip. It is performed in the same way as in bodybuilding. This exercise allows you to strengthen your triceps and anterior deltoid muscles.
10. Wide grip bench press. The goal is to strengthen the middle part of the pectoral muscles. The technique is similar to bodybuilding.
11. Bench press upside down. The goal is to strengthen the lower pectoral muscles and triceps. The grip width is the same as in the bench press. This exercise is especially useful for those who have just switched to the bridge press technique.
12. Incline bench press. The inclination of the bench is about 45°. This allows you to load both the upper chest and the anterior deltoid muscles. The grip width is the same as in a bench press. The technique is the same as in bodybuilding.
13. Reverse grip bench press. This exercise is performed like a regular bench press, but the grip you use on the barbell is reversed. This allows you to better load individual triceps and chest bundles.
This is where we will finish the description of the auxiliary exercises. But this does not mean that they no longer exist. You should use the entire arsenal of exercises for triceps, deltoids and chest that are known in bodybuilding. In addition, you cannot focus on the same exercises; they need to be changed and modernized.
Now let's move on to perhaps the most interesting part of this section and look at several different training systems for the bench press
The main property of endurance is specificity
Alas, endurance is an extremely specific quality. By developing it in one direction, we do not develop endurance in other exercises. It is a fact.
To some extent, from a certain level of development, the principle of synergy begins to operate, when development in one area of training helps in other areas. But this effect is quite weak. More often than not, we develop great endurance in the movement in which we train the most. And if we slightly change the type of movement, the endurance in it decreases sharply. And it has to be developed again in this exercise.
For example, if you perfectly train your ability to do push-ups, this will have almost no help in doing pull-ups on the horizontal bar. And so it is in almost everything that concerns endurance.
To train endurance, train it in exactly the exercise for which you need it.
It doesn't make much sense to run to increase your boxing endurance. It’s better to box more and practice the necessary movements. There is no point in doing quantity squats for runners. It is better to run at the required pace. Always do the same and you will get very good results.
